The right stucco anchor is chosen by the material behind the finish, not by the finish alone. A light sign and a moving gate demand different attachment plans, so identify the wall before drilling.
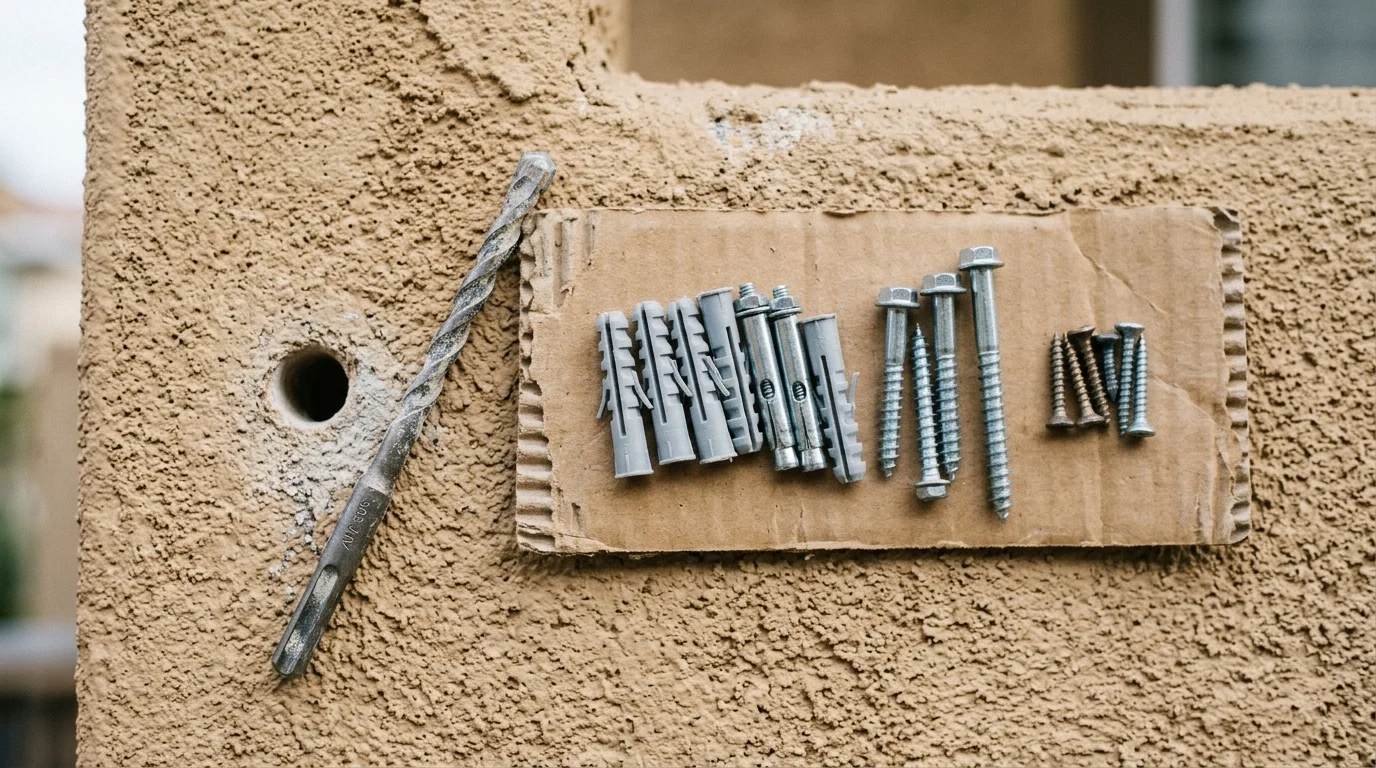
Stucco is a skin, not a structure: what that means for anything you hang
Stucco forms the visible exterior surface. It shouldn’t automatically be treated as the part carrying your load. A fastener may pass through the finish and grip framing, sheathing, masonry, blocking, or an approved hollow-wall anchor. Those are different connections.
That distinction matters even for familiar projects. Address numbers place little force on a wall. A hose reel carries more weight and gets pulled repeatedly. An awning adds movement and force away from the wall. The same screw isn’t automatically suitable for all three.
Start by separating the finish from the supporting material. Then check the fastener manufacturer’s instructions for that specific material. The label should identify the intended substrate, installation method, and rated capacity. Don’t transfer a rating from concrete to an unknown wall assembly.
San Diego County homes don’t share one wall type. Even one property may have original walls, an addition, and a converted garage built differently. The finish can make those sections look identical. It can’t confirm what’s underneath.
What is behind the stucco and why finding it decides the fastener
Before choosing stucco anchors, determine what the fastener must grip. The drill path may encounter a finish layer, lath, sheathing, a wall cavity, framing, blocking, or solid masonry. Which materials are present depends on the wall.
Look for evidence before making a hole. Interior wall thickness, nearby outlets, attic access, construction drawings, and visible details around unfinished openings may help. An electronic detector can provide another clue, but its reading isn’t a substitute for knowing the assembly.
Don’t assume every wall on a house matches. A front wall in Chula Vista could have been built during a different project than a later rear addition. The same issue appears in San Diego, La Mesa, Oceanside, and other county communities. Remodeling history matters more than the city name.
When the supporting material remains uncertain, pause. A licensed stucco contractor can inspect the proposed location and explain what a repair would involve if exploratory access is needed. That inspection is especially useful when the finish sounds hollow, flexes, or differs from adjacent walls.
Framing, sheathing, lath and the air behind them
These materials perform different jobs, so don’t treat them as interchangeable anchor points. Framing and added blocking can carry attachments when the fastener and connection are specified for them. Sheathing may or may not be an approved anchor substrate. Its material and condition must be identified first.
Lath supports a stucco system, but finding metal behind the finish doesn’t prove that you’ve found framing. A drill bit may touch lath and create a misleading sense of resistance. Keep that uncertainty in mind before hanging anything important.
A wall cavity presents another problem. A screw that passes through the finish but grips nothing behind it hasn’t created a dependable connection. A hollow-wall fastener may be appropriate in some identified assemblies, but its packaging must approve that substrate and wall configuration.
The safest planning question is simple: what will the fastener engage after it passes through the stucco? If the answer is only “something behind there,” the anchor selection isn’t finished. Locate framing or blocking, identify the masonry, or have the wall evaluated before proceeding.
Anchoring into the stucco itself versus anchoring through it
Small decorative items sometimes come with anchors marketed for masonry or stucco. That label doesn’t make every stucco wall an approved substrate. Read the package carefully. “For masonry” can refer to a specific base material, not every textured exterior finish.
Anchoring through stucco usually means the finish is only part of the path. The fastener continues into a known supporting material. Its length, diameter, head, corrosion suitability, and installation method must match the complete connection. Use the product documentation, not a generic online chart, to make those choices.
Anchoring only within the finish offers less information. You may not know the finish’s condition, thickness, bond, or hidden damage. A strong-looking patch of wall also doesn’t prove the surrounding material can carry the planned load.
Make the hole carefully after the location is confirmed. Our guide to drilling into stucco without cracking covers the drilling decision in more detail. Anchor selection comes first, because a neat hole in the wrong substrate still creates the wrong connection.
Anchor families and what each one grips
Anchor names can be confusing because stores group many products together. Focus on the gripping action and approved substrate instead.
Masonry screws cut or form a connection in a compatible solid masonry base. Expansion anchors press outward inside an approved drilled hole. Hollow-wall anchors open or expand behind a suitable panel. Screws intended for wood rely on adequate framing or blocking. Specialty attachment systems may be required for proprietary exterior wall assemblies.
None of those descriptions establishes a load rating for your wall. The manufacturer sets the permitted substrate, hole preparation, spacing, edge distance, fastener size, and capacity. Follow the current instructions supplied for the exact product.
Don’t combine unrelated parts unless the manufacturer approves that combination. A longer screw, larger washer, or different plug can change how the connection behaves. More metal doesn’t automatically create a better anchor.
Take a photo of the package and product number before installation. Keep the instructions with your project records. If a contractor handles the mounting, ask what material the fastener will grip and why that attachment suits the load. A clear answer should identify the supporting material, not just say the screw is “for stucco.”
Static load versus dynamic load: a mailbox is not a TV mount
Weight isn’t the only force an anchor faces. A fixed plaque applies a mostly steady load. A gate latch, hose reel, folding rack, or movable mount gets pushed, pulled, twisted, or bumped. Wind can also move exterior attachments.
That repeated movement can work a connection differently than a motionless object of similar weight. It may also place force farther from the wall. A mounting arm that projects outward creates a different condition than a flat sign resting close to the surface.
Don’t select an anchor using item weight alone. Include the bracket, stored contents, movement, and the way people will use it. Then compare that complete situation with the fastener manufacturer’s instructions.
For equipment, railings, shade structures, and other consequential attachments, the product maker or a qualified installer should define the mounting requirements. If structural work or a permit may be involved, confirm the current requirements with the city or county that issues permits where you live.
Pull-out and shear, in plain terms
Pull-out force tries to draw the fastener straight away from the wall. Shear force tries to slide the attached item downward across the wall face. Many real installations create both forces at once.
A flat, stationary number plate may sit close to the surface. A projecting bracket places its load farther outward, which changes how the connection is stressed. Movement makes the comparison more complicated.
This is why an anchor’s advertised capacity can’t be separated from its test conditions. Substrate, installation depth, hole quality, spacing, and loading direction can all be part of the manufacturer’s rating. Don’t convert that rating into a promise for an unidentified stucco wall.
If failure could injure someone or damage the building, don’t experiment with several anchors until one feels tight. Have the connection designed around known framing, blocking, or another confirmed supporting material. Feeling resistance while tightening a screw doesn’t reveal the complete condition behind the finish.
Sealing the penetration so the anchor does not become a leak
Every exterior hole deserves a water-management plan. The right detail depends on the wall system, attachment, fastener, and exposure. A surface bead alone shouldn’t be treated as proof that the penetration is protected.
Confirm sealant compatibility with the stucco finish and the attachment material. Some brackets need a specific gasket, flashing detail, or mounting method supplied by their manufacturer. Follow those instructions and preserve any intended drainage path.
Inspect the area before drilling. Existing cracks, staining, loose finish, or a previous failed patch can signal that the location needs repair first. Placing a new anchor through damaged material hides the problem without resolving it.
If an old fastener is removed, don’t leave the opening exposed. Small abandoned holes may need stucco patching and texture matching. Cracks extending away from the hole call for a closer look and may need stucco crack repair. A licensed stucco contractor can determine an appropriate repair method after seeing the wall.
Heavy items where the answer is blocking, not a better anchor
Heavy or high-consequence attachments often need a planned structural connection. Examples include large awnings, equipment, railings, projecting mounts, and items people may lean on or pull. A stronger package label can’t compensate for an unknown substrate.
Blocking provides a known target when it’s properly selected and installed for the attachment. On new work, the mounting location can be coordinated before the wall closes. Existing walls may require access, investigation, and restoration around the connection.
Don’t keep enlarging a failed hole to accept a bigger anchor. That can remove more material without answering why the first connection failed. The issue may be a hollow cavity, damaged substrate, missed framing, or an unsuitable anchor family.
For construction work, confirm whether a permit is required with the city or county serving the property. Hire a properly licensed contractor when the scope requires one. You can verify a contractor through the CSLB license check before signing an agreement.
When the hole you are about to drill is a bad idea
Stop before drilling when you can’t identify the supporting material. Also stop if the proposed point sits near utilities, flashing, drainage details, an opening, visible cracking, loose stucco, or an earlier repair. Those conditions need investigation, not guesswork.
A bad location can also come from the attachment itself. The bracket may cover damage, trap water, interfere with movement, or place its fasteners too close together for the chosen product. Check the attachment maker’s complete installation instructions before marking holes.
Don’t continue when the drill behaves differently than expected. Sudden resistance, an unexpected cavity, or crumbling material means the original wall assumption may be wrong. Remove the bit and reassess instead of forcing it deeper.
If you already made the wrong hole, protect the area and arrange a proper repair. Don’t hide it behind the object and hope the bracket keeps water out. The repair should address the opening and match the surrounding finish as closely as practical.
When to call us
Call when the wall assembly is unknown, the stucco is cracked, or the attachment needs framing, blocking, or a repaired penetration. Those conditions deserve a licensed stucco pro who can inspect the wall before mounting continues.
Call us at (858) 400-4352 and we’ll connect you with a licensed local stucco contractor.