A clean-looking stucco patch starts with what you can’t see. To repair a hole in stucco, inspect the backing, replace damaged support, rebuild the wall layers in sequence, then match the finish texture. Surface filler alone won’t reveal whether the lath, paper, framing, or moisture behind the stucco also needs attention.
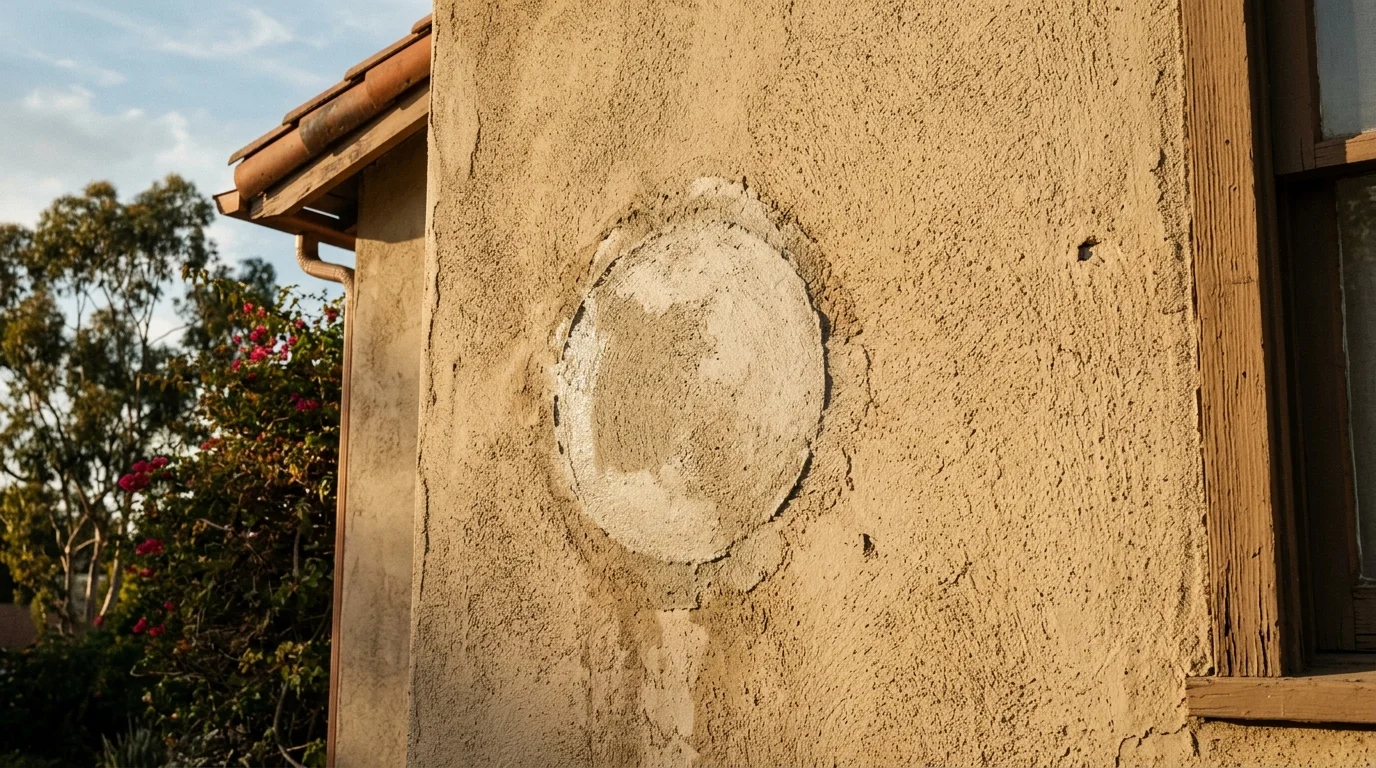
What actually makes a hole in stucco
The cause helps define the repair. An impact may leave broken stucco around the opening. Removing a hose reel, light, railing, or other fixture can expose old fastener holes. A vent or pipe cut-in creates a planned opening that still needs careful finishing around its edge.
Dry rot or moisture behind the wall creates a different situation. The visible hole may only be the place where the surface finally gave way. Covering it without examining the area behind it can hide the reason the wall opened.
Start by recording the hole’s location and cause. Note whether it sits beneath a window, beside a penetration, near the foundation, or where a fixture was removed. Photograph the opening before loose material or trim changes its appearance. Those details help a licensed contractor decide how much investigation the wall needs.
Don’t choose a patching product from diameter alone. Two openings of the same size can expose very different conditions underneath.
Why a hole isn’t the same repair as a crack
A crack is a narrow separation in material that remains largely in place. A hole removes part of the wall. Repairing it means restoring the missing section, not simply filling a line.
That distinction matters when comparing a hole with the examples in our guide to stucco crack types in San Diego. A crack repair may focus on the separation and surrounding finish. A hole may expose lath, paper, framing, or the edge of another wall penetration.
Think of the repair as an assembly. The visible finish is only its outer surface. If material behind that finish is cut, loose, missing, or damp, the scope changes.
This is also why a thick, single-pass filler can remain obvious. It treats the opening as an empty spot rather than a missing section of a layered wall. Even when the hole closes, its edge, texture, and color may still outline the repair.
Check what is behind the stucco first
Inspection comes before filling. Look into the opening without pulling on intact material or enlarging it casually. The goal is to identify what remains behind the visible edge.
The items needing attention include lath, building paper, framing, and signs of moisture. Note whether the opening contains torn paper, damaged lath, soft material, staining, or debris. A pipe, wire, vent, or fixture mount also changes where repair material can go.
Don’t assume a dry surface proves the concealed area is dry. If the opening followed a leak, staining, or recurring damage, a licensed pro should investigate the source before closing the wall. The finished patch shouldn’t become a cover for an unresolved problem.
A repair around plumbing, electrical equipment, windows, or vents may also involve another trade. Stucco work shouldn’t interfere with those components. When the opening crosses more than one system, let the appropriate licensed professionals define their parts of the job.
The inspection should produce a clear answer: which existing layers can remain, and which damaged portions require replacement.
Whether the lath survived
The lath condition separates a shallow surface repair from a deeper rebuild. If it remains intact, the contractor can evaluate whether the repair can use that existing support. If it’s cut, loose, bent, or missing, the opening needs more than finish material.
Don’t push filler into the cavity and treat that as support. A licensed stucco contractor should determine how the damaged area connects with sound material around it. The exact approach depends on the wall found at the property.
Avoid guessing about fasteners, overlaps, material dimensions, or coat thicknesses. Those details aren’t confirmed for every wall system or address. They should come from the selected repair system, its current instructions, and any requirements set by the authority responsible for the property.
When lath replacement becomes part of the scope, review the proposed boundary before work starts. A slightly larger working area may be necessary to reach sound surrounding material. Our lath replacement service explains how we connect homeowners with licensed local pros for that work.
The layered rebuild
A conventional layered repair follows the wall outward. The broad sequence is lath, scratch, brown, and finish. Not every opening exposes every layer, so the inspection determines where that sequence begins.
The repair plan should account for four stages:
- Restore damaged backing or lath where needed.
- Rebuild the scratch layer within the selected repair system.
- Add the brown layer required by that system.
- Apply a finish that matches the surrounding wall.
This sequence doesn’t establish universal thicknesses, mixing ratios, or waiting periods. Those figures couldn’t be confirmed from the approved project sources. Check the current product instructions and requirements for the exact wall before mixing or applying material.
The edges deserve as much attention as the center. A patch must meet the existing wall without turning its outline into a new visual feature. That takes control over the repair boundary, finish level, and texture.
Single-pass filler skips the planned layered rebuild. It also leaves one surface application responsible for depth, edge transition, color, and texture. For a hole that exposes the wall assembly, discuss a true stucco patching repair with a licensed contractor.
Curing and temporary color differences
A new patch may look lighter or darker than the surrounding wall while it cures. Don’t judge the final match immediately after application. Moisture, lighting, and the new surface can make the repair stand out.
There isn’t one verified cure time that applies to every repair described here. Product, finish, weather, and the wall itself can change the schedule. Follow the current instructions for the specific materials used. The contractor should also explain when the patch can receive any planned finish treatment.
Take comparison photos from the same position and around the same time of day. San Diego’s strong angled light can make small surface differences easy to notice. Morning shade and late afternoon light may present the same patch differently.
If the color remains different after the required cure period, ask whether the next step is a finish adjustment or a broader color treatment. Don’t coat a fresh repair early just to hide a temporary difference.
Matching the existing texture
Texture matching is what keeps a sound patch from reading as a smooth disk. The contractor first needs to identify the surrounding finish, then reproduce its scale, direction, and density across the repair.
Inspect the wall from close range and from the normal viewing distance. Close inspection shows the texture itself. Stepping back reveals whether the repair catches light differently or creates a visible border.
A small sample area can help establish the approach before the full finish goes on. The goal isn’t to invent a similar texture. It’s to continue the pattern already present on that wall. Previous paint or finish coats may affect what the contractor sees and how the new surface appears.
Raking sunlight makes ridges and low spots especially visible. Check the patch under the lighting that normally exposes the wall. This matters on open elevations across San Diego County, from coastal North County to inland neighborhoods.
Some repairs need more than work inside the original opening. If the surrounding finish can’t be blended within that boundary, discuss the options with a texture-matching pro before approving a larger treatment area.
When a hole points to a bigger problem
A hole can be a symptom rather than an isolated accident. Slow leaks, dry rot, damaged framing, or repeated movement may affect material beyond the visible opening.
Pause when the surrounding wall feels soft, the opening keeps widening, stains return, or nearby finish begins separating. Don’t cover those clues before documenting them. A contractor may need to open enough of the area to identify the repair boundary.
Pay close attention around windows, roof transitions, vents, pipes, and mounted fixtures. These locations bring stucco beside other building components. The responsible trade should address the source of damage before the finish closes the wall again.
Fire-zone status also shouldn’t be guessed from a neighborhood name. California uses mapped determinations for wildland-urban interface and fire hazard areas. Confirm the parcel through Cal Fire’s current mapping and the local building department if the repair affects the exterior wall assembly.
A larger concealed problem changes the job from cosmetic patching to diagnosis and coordinated repair. That’s the point to stop experimenting with surface products.
Permit and licensing context in California
Permit requirements depend on the work and the authority responsible for the address. For property inside the City of San Diego, check with Development Services. For another city or an unincorporated area, contact the building department that controls that parcel. Ask about the actual scope, including any damaged lath, paper, framing, or wall penetration.
California Business and Professions Code section 7048 provides a narrow contractor-license exemption. Effective January 1, 2026, the aggregate contract price for labor, materials, and all other items must be less than $1,000. The work must also be casual or minor, and it must not require a building permit.
All those conditions matter. A project requiring a permit doesn’t qualify for that exemption merely because its price falls below the threshold. Splitting a project into smaller contracts to avoid licensing is excluded. Anyone advertising as a contractor also loses the exemption at any price.
Unlicensed contracting outside an exemption is a misdemeanor under Business and Professions Code section 7028. You can verify a contractor through the official CSLB license check.
For a covered home improvement contract, California limits the downpayment to $1,000 or 10 percent of the contract amount, whichever is less. Ask the contractor to explain the written payment schedule before work begins.
When to stop and get a licensed pro
Stop when the hole exposes damaged lath, torn paper, framing concerns, moisture, or another building system. You should also get help when the repair requires a permit, spans a broad area, or can’t be matched within the original boundary.
A licensed contractor can define the opening, select the repair system, and explain its instructions. Verify the license independently through CSLB. Ask who will handle any related plumbing, electrical, framing, or moisture work.
Stucco Pro SD is a referral service. We don’t perform repairs or hold a contractor license. We connect San Diego County homeowners with licensed, independent local stucco professionals.
When to call us
Call when a hole reaches beyond the finish, exposes damaged lath, or needs careful texture matching. Call us at (858) 400-4352 and we’ll connect you with a licensed local stucco contractor.