A re-stucco Valley Center decision starts with one issue: can a smaller repair meet your visual goal? Patching may address an isolated area, but the result can still stand out across the wall. A licensed independent stucco contractor should assess both the affected area and the surrounding finish.
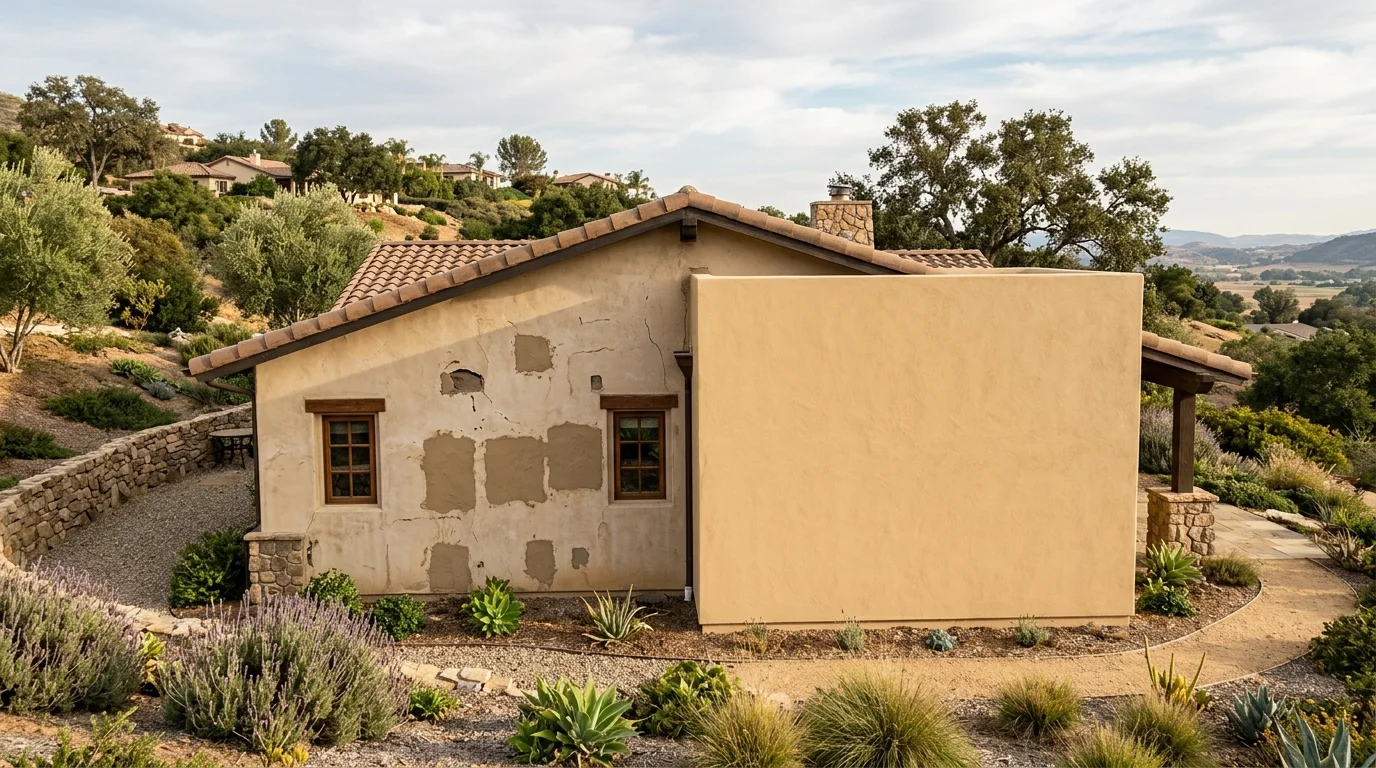
When isolated patches remain the sensible choice
A patch remains a practical option when the work is limited. The homeowner must also be comfortable with how that area may look afterward. Those are separate decisions.
Start by identifying the exact repair boundary. A written proposal should mark which areas receive work. It should also explain what happens to nearby cracks, edges, trim, and existing repairs. If the wall has several affected spots, ask for those locations to be marked in photographs.
The matched contractor should explain the proposed texture and finish treatment. Ask whether the goal is a close local match or a broader visual reset. Avoid descriptions such as “blend as needed.” That wording doesn’t show where the new work begins or ends.
Our stucco patching service connects homeowners with licensed independent pros for this type of assessment. The pro performs the work and defines the proposed repair system.
A patch may make sense when:
- The affected area has a clear boundary.
- The surrounding finish can remain in place.
- The homeowner accepts some visible variation.
- The proposal explains the repair and finish separately.
- Both parties agree on the viewing area used for approval.
Look at the proposed boundary from normal positions around the property. A close inspection matters, but so does the view from an entry, driveway, patio, or neighboring wall. Those views can reveal whether a localized repair fits the homeowner’s expectations.
Don’t approve patching based only on a small color chip. Texture, color, sheen, and the outline of the repaired area all affect the final appearance. The contractor should address each item before work begins.
Why repeated repairs can leave a wall visually uneven
Every patch creates another transition within the elevation. The texture may differ slightly. The color or sheen may also read differently. An older repair can remain visible beside a newer one, even when both areas are intact.
That doesn’t automatically mean the entire exterior needs re-coating. It does mean the wall should be reviewed as one visual surface. Count the visible repairs, note their locations, and compare them from the places where people usually see the home.
Repeated spot work can produce a wall with several distinct areas. One patch may be smoother. Another may carry a heavier pattern. Paint or finish from different projects can add more variation. Changing daylight may make those differences more noticeable.
A broader re-coat treats the selected wall or elevation as a continuous visual unit. It shouldn’t be presented as a substitute for needed repairs underneath. The proposal should separate the repair stage from the finish stage.
Our countywide guide to patching versus re-coating stucco provides a broader comparison. For a Valley Center property, bring that decision back to the actual elevations. One wall may need a different scope from another.
Ask the contractor to identify exactly what “full re-coat” means. It could refer to one wall, several elevations, or another defined area. The contract should name those surfaces and show where the finish stops.
This distinction protects the visual goal. A broad phrase such as “re-stucco the house” leaves too much open to interpretation. A wall-by-wall scope makes competing proposals easier to compare.
How existing paint and finish affect re-coating options
Existing paint changes the questions a contractor must answer. The wall may be painted, unpainted, or mixed because of earlier repairs. That condition should appear in the proposal before a finish system is selected.
Ask the contractor to identify the visible surface on every included elevation. The written scope should then name the proposed preparation and finish products. It should also state whether those products are intended for the observed surface.
Don’t let “re-stucco” become a catchall term. Homeowners may use it to mean a new finish, a coating, repairs followed by a finish, or removal and replacement. Those scopes aren’t interchangeable.
A clear re-stucco scope should answer these questions:
- Which walls or elevations are included?
- Which existing areas receive repairs first?
- How will existing paint be addressed?
- What finish and texture are proposed?
- Where will the new finish stop?
- Which surfaces, trim, and openings are excluded?
- What sample will be reviewed before approval?
If an elevation contains both old patches and painted areas, ask how the complete system addresses that mix. The contractor should explain the sequence in plain language. Product names and preparation steps belong in the written proposal, not only in a conversation.
Color selection deserves its own discussion. A color chip shows color, but it doesn’t show the full wall texture. It also doesn’t define sheen or how repaired sections will be treated. Ask for a sample that reflects the proposed combination.
The final choice should follow the wall assessment. Starting with color alone skips the condition that determines the available scope.
What Valley Center homeowners should compare in each scope
Compare proposals line by line, not by the project label. Two contractors may both write “re-coat,” yet include different walls, preparation, repairs, and finish systems.
Begin with the repair map. Each proposal should identify cracks, patches, damaged areas, and previous repairs included in the price. It should also list exclusions. Without that detail, homeowners can’t tell whether they’re comparing the same job.
Next, compare the visual boundaries. A patch proposal needs a defined repair edge. A re-coat proposal needs defined wall or elevation endpoints. Corners, openings, trim, and transitions should be discussed before approval.
Review these scope items together:
- The exact surfaces included
- Existing paint or finish conditions
- Repairs completed before the finish
- Proposed texture and color
- Sample and approval process
- Preparation stated in writing
- Cleanup and protection responsibilities
- Permit responsibility, if a permit is required
- The contractor classification and license status
Stucco falls under California’s C-35 lathing and plastering contractor classification. Homeowners can verify a contractor through the official CSLB license check. Search the contractor’s information and review the current record before signing.
No Valley Center-specific permit requirement was confirmed in the San Diego County research supplied for this page. Ask the contractor to identify the authority serving the exact property. That authority should confirm whether the proposed scope requires a permit.
California also regulates exterior wall assemblies in mapped wildland-urban interface areas through California Building Code Chapter 7A. A property’s status is determined by official mapping. Don’t assume a Valley Center parcel is inside or outside a mapped fire hazard severity zone. Check Cal Fire’s mapping and confirm the applicable requirements with the local building department.
Price alone can’t show whether two scopes match. One may cover isolated repairs, while another includes a continuous finish across several elevations. Resolve those differences before comparing the proposals.
How to review samples before approving the finish
A sample turns a broad finish description into something visible. It doesn’t guarantee that every part of a large wall will look identical. It does give the homeowner and contractor a shared approval point.
Ask where the sample will be prepared. A small sample on the actual wall can show how the proposed texture relates to nearby surfaces. A separate mockup may make side-by-side comparisons easier. The contractor should explain what the sample represents.
Review more than color. Look at texture size, pattern, direction, sheen, and overall consistency. View the sample from nearby and from common approaches to the home. Natural daylight can change how surface differences appear.
If existing paint is part of the project, confirm that the sample represents the proposed preparation and finish system. A color placed on an unrelated surface may not answer the same question.
Document the approved sample. Keep the product description, color name, texture choice, and sample photographs with the contract. Ask the contractor how approved variation will be evaluated across the larger surface.
The sample review should also confirm transition points. Walk the included elevations and identify where the new finish ends. Pay particular attention to corners, trim, openings, and walls outside the scope.
Don’t rush approval because a sample looks acceptable from one position. Compare it with the surrounding wall and the stated project goal. If the goal is a continuous appearance, judge the sample as part of that broader elevation. If the goal is a limited repair, decide whether the expected transition is acceptable.
A clear sample process won’t replace a detailed scope. It makes that scope easier to understand before the contractor proceeds.
When to call us
Call when patches remain visible, several repairs interrupt one elevation, or existing paint makes the finish scope unclear. A licensed stucco pro can assess the wall and explain whether localized patching or a broader re-coat better fits your goal. Call us at (858) 400-4352 and we’ll connect you with a licensed local stucco contractor.