For stucco repair and paint, the repair normally comes first. The contractor identifies the damage, completes the patching, confirms the repaired areas are ready, and then turns the wall over for primer and paint.
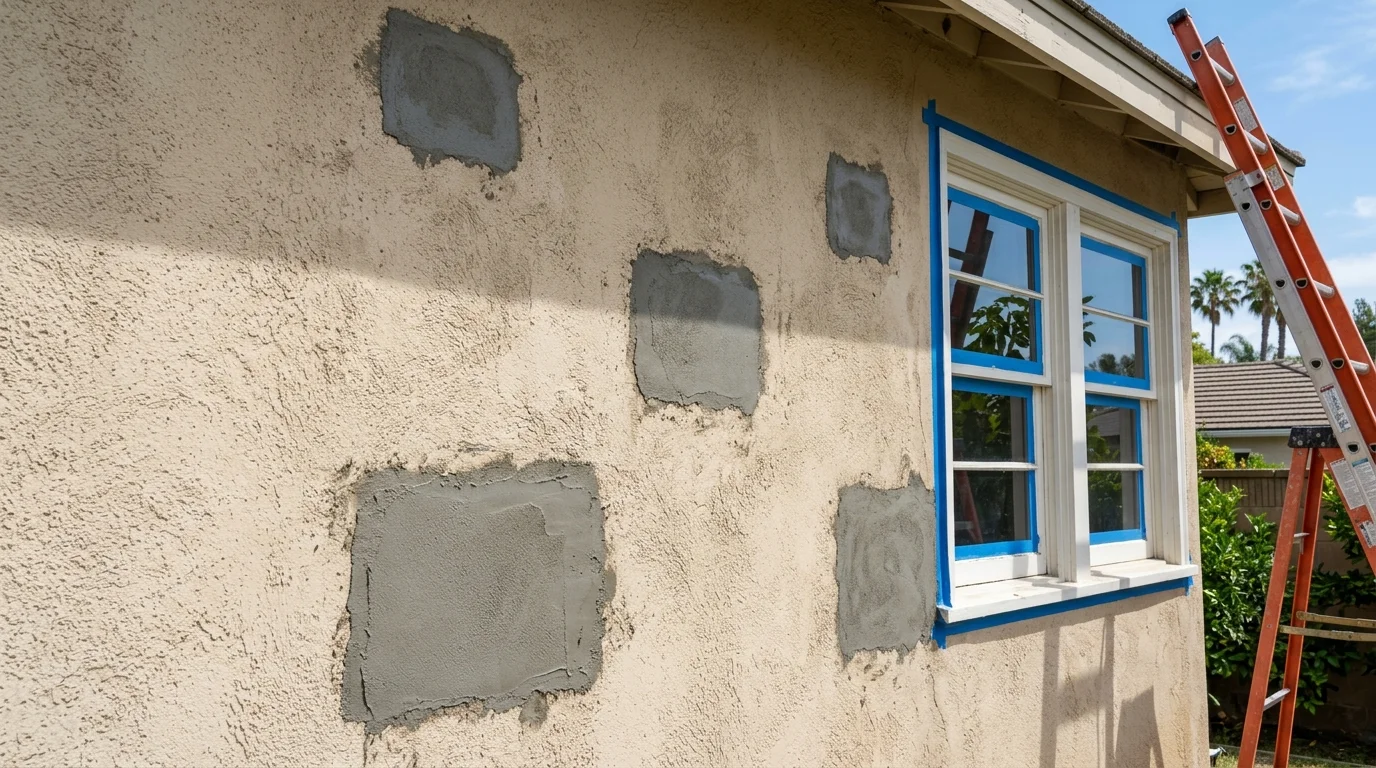
The default order and why it is the default
Start by inspecting the entire elevation, not just the obvious crack. A wall can have loose areas, old patches, failed sealant, staining, or texture differences that become clearer during preparation.
The stucco contractor then defines the repair area. That may mean opening a damaged section, removing material that won’t support a patch, and rebuilding the surface. The exact scope depends on what the contractor finds.
After the repair, the patch needs enough time to reach the condition required by its manufacturer. The contractor should confirm that point before the painting scope begins. There isn’t one approved waiting period that fits every repair product, wall, and day.
Next comes exterior paint preparation. That usually includes checking the repaired surface, cleaning as required, protecting nearby features, and following the coating maker’s primer instructions. Painting is the final finish step.
This sequence applies whether the house sits along the I-5 corridor, in central San Diego, in East County, or in the South Bay. Conditions vary by wall and property, but the basic order stays the same: diagnose, repair, confirm readiness, prepare, prime, and paint.
Why a repair under fresh paint is a wasted coat of paint
Fresh paint can make a wall look finished before the underlying problem is handled. If a crack, loose patch, or damaged edge still needs to be opened, the new coating will be cut, scraped, or removed during that work.
That creates duplicate preparation. The repaired section must be cleaned and coated again. Nearby paint may also need attention so the new work doesn’t leave an obvious border.
Paint isn’t a substitute for stucco patching. It changes the surface color and finish. It doesn’t rebuild missing stucco or make a weak section sound. If the source of visible damage hasn’t been identified, coating over it can also make later diagnosis harder.
There are limited cases where painting and repair may overlap across separate walls. One sound elevation could move forward while another receives repair. That decision should be written into the schedule. The trades also need to agree on protection, access, and the point when each wall changes hands.
The safer planning assumption is simple. Don’t buy a finished paint job twice. Settle the repair scope before coating the affected elevation.
Cure time: the constraint that drives the whole schedule
The repair material controls the waiting period, not a generic calendar. Product type, patch depth, surface conditions, weather, and the selected coating system can all affect the contractor’s readiness decision.
No single cure time can be confirmed for every San Diego stucco repair. The patch material’s manufacturer sets its own instructions. The primer and paint manufacturers may also state when their products can go over a repaired surface.
Ask the stucco contractor to identify the patching product in writing. Then ask who will confirm that it’s ready for primer. “We’ll wait a few days” isn’t a useful handoff standard unless it matches the product instructions and observed wall conditions.
Site differences matter here. A shaded wall near the coast won’t have the same daily exposure as a sun-facing wall farther inland. Even two elevations on the same Chula Vista or Clairemont home may behave differently.
Build flexibility into the schedule. Don’t book painting around an assumed date that nobody owns. Book it around a documented readiness check, with a clear process if the patch needs more time.
Painting a patch too early and what it does to the film
A coating applied before the repaired area is ready can behave differently over the patch. Depending on the materials involved, the finished area may show a different sheen, color, bond, or surface appearance.
The result isn’t always obvious while the paint is wet. A wall can look uniform during application, then reveal the patch after the coating settles. Repainting the spot may not solve the underlying mismatch.
This is why the painter should know what repair material was used. The painter also needs the manufacturer’s preparation requirements. Guessing from the patch color or touching the surface isn’t a substitute for that information.
If the schedule has already slipped, don’t let the original paint date force the decision. Ask the stucco contractor and painter to document whether the surface is ready. If they disagree, pause that elevation until the requirements are clear.
The lost time is frustrating, but coating a questionable patch transfers the uncertainty into the finished wall. That makes responsibility harder to sort out later.
Color: why the patch will read through a single coat
A repaired area begins with a different surface. Its color, texture, porosity, and edge pattern may not match the surrounding wall. A thin paint application can leave those differences visible.
Color is only part of the problem. Light can catch a smoother patch beside a rough sand finish. A repaired rectangle may also show through because its perimeter was finished differently from the original texture. Texture matching should be addressed before paint, not left for the coating to disguise.
Touch-up paint creates another variable. The existing wall may have changed since it was last painted. Even paint saved from the original job may not appear identical after storage and application over a new patch.
Ask for a sample area when appearance matters. View it from the sidewalk and from the usual driveway approach. Check it under the light that normally reaches that wall.
For prominent areas, painting from corner to corner often gives the eye fewer transition points. It won’t correct poor texture work, but it can avoid leaving a small island of fresh paint in the middle of an older elevation.
Priming and spot-priming repairs
Primer selection should follow the repair material and coating manufacturer’s instructions. The contractor shouldn’t treat every gray patch as if it needs the same product.
Spot-priming may be appropriate when the surrounding coating remains suitable and the finish plan allows it. In other situations, the painter may recommend priming the full elevation. That decision belongs in the written painting scope.
Ask whether the primer will cover only the patch or extend beyond its edges. Also ask how the painter will prevent a visible change in build or sheen where the primed area ends. These details matter most on smooth finishes and walls seen in strong side light.
Primer can prepare a compatible surface for paint. It can’t correct an uneven patch, recreate missing texture, or settle whether damaged stucco was removed far enough. Those items belong to the repair phase.
Our guide to preparing stucco for repainting covers the broader preparation process for a sound wall. A repaired wall adds another checkpoint: the patch must meet the selected coating system’s requirements before primer begins.
Doing the whole elevation instead of touching up
Touch-up work is most attractive when the damaged area is small. It also creates the highest risk of a visible paint boundary. The patch may match closely at arm’s length but stand out from the street.
Painting the whole elevation moves natural stopping points to corners, trim lines, or another architectural break. That usually gives the painter a cleaner place to end the coating. It also creates one finish application across the repaired wall.
This doesn’t mean every stucco repair requires painting the entire house. A rear utility wall and a front entry elevation don’t carry the same visual stakes. A small patch behind landscaping may also tolerate a closer, rather than exact, match.
Decide the acceptable result before bidding. “Touch up the patch” and “make the front elevation read as one finish” are different scopes. They should receive different preparation plans.
Ask each contractor where the paint will stop. Walk those boundaries in person. On San Diego homes with connected walls, pop-outs, balconies, and garage returns, the word “elevation” can still leave room for disagreement.
Where the trades hand off and who owns the result
The handoff should happen after the repair contractor completes the agreed patch and confirms it’s ready for the next stage. The painter should then inspect the surface before accepting it.
Responsibility becomes unclear when one contractor says the patch is paint-ready and another says it needs more work. Avoid that dispute by defining an acceptance step. It can be a joint walkthrough, written approval, or photos tied to each repair location.
Separate the finish responsibilities. The stucco contractor may own the patch shape and texture. The painter may own primer, color, sheen, and coating coverage. Those divisions need to match the actual proposals.
Don’t assume one trade will correct the other trade’s work without a change in scope. If the painter finds a rough edge, the agreement should say whether the stucco contractor returns or the painter prices added preparation.
Before hiring, verify the stucco contractor through the CSLB license check. Stucco Pro SD is a referral service. We connect homeowners with licensed independent local pros, and those contractors perform the physical work.
Getting both scopes in one contract versus two
One contract can make scheduling and finish responsibility easier to follow, but only when the contractor actually includes both scopes. Read the proposal closely. “Patch and paint” can still leave open questions about texture, primer, paint limits, and surface protection.
Two contracts can give you more choice. You can select a stucco specialist for the repair and a painting contractor for the coating. The tradeoff is that you’ll need a stronger handoff plan.
Compare the documents side by side. The repair contract should identify locations and the intended finish condition. The painting contract should identify preparation, primer, coating areas, and stopping points.
Don’t rely on verbal statements about who will return if the patch shows through. Ask each contractor to state what their scope covers. Any warranty terms must come from that independent contractor and appear in its documents. Stucco Pro SD doesn’t perform the work or issue warranties.
If you’re comparing proposals, make sure they describe the same result. A spot touch-up and a full-elevation repaint aren’t interchangeable bids.
What to agree before either crew starts
Mark every known repair location during a walkthrough. Include cracks, holes, loose areas, damaged corners, trim interfaces, and previous patches that need review.
Then settle these points in writing:
- Which contractor diagnoses and repairs each area
- Which repair products will be used
- Who confirms readiness for primer and paint
- Who owns texture matching
- Whether primer is spot-applied or elevation-wide
- Where each paint area begins and ends
- How windows, doors, roofing, paving, and landscaping are protected
- Who handles added damage discovered during preparation
- How schedule changes are communicated
- What contractor-issued warranty terms apply
Permit needs depend on the actual work and property jurisdiction. This page can’t confirm whether a particular scope requires one. Ask the city or county that issues permits where the home is located, then identify which contractor will handle any required process.
Keep photos from before repair, after patching, after primer, and after painting. They create a clear record of the handoffs without relying on memory.
When to call us
Call when cracks, loose material, recurring patches, or texture differences need a licensed stucco professional before painting begins. Call us at (858) 400-4352 and we’ll connect you with a licensed local stucco contractor.