The right tools for stucco repair depend on the patch depth and finish. A small surface patch may need six basic tools. Damage reaching lath, mesh, or concealed wall layers calls for a different setup and usually a licensed stucco contractor.
The short list for a small patch
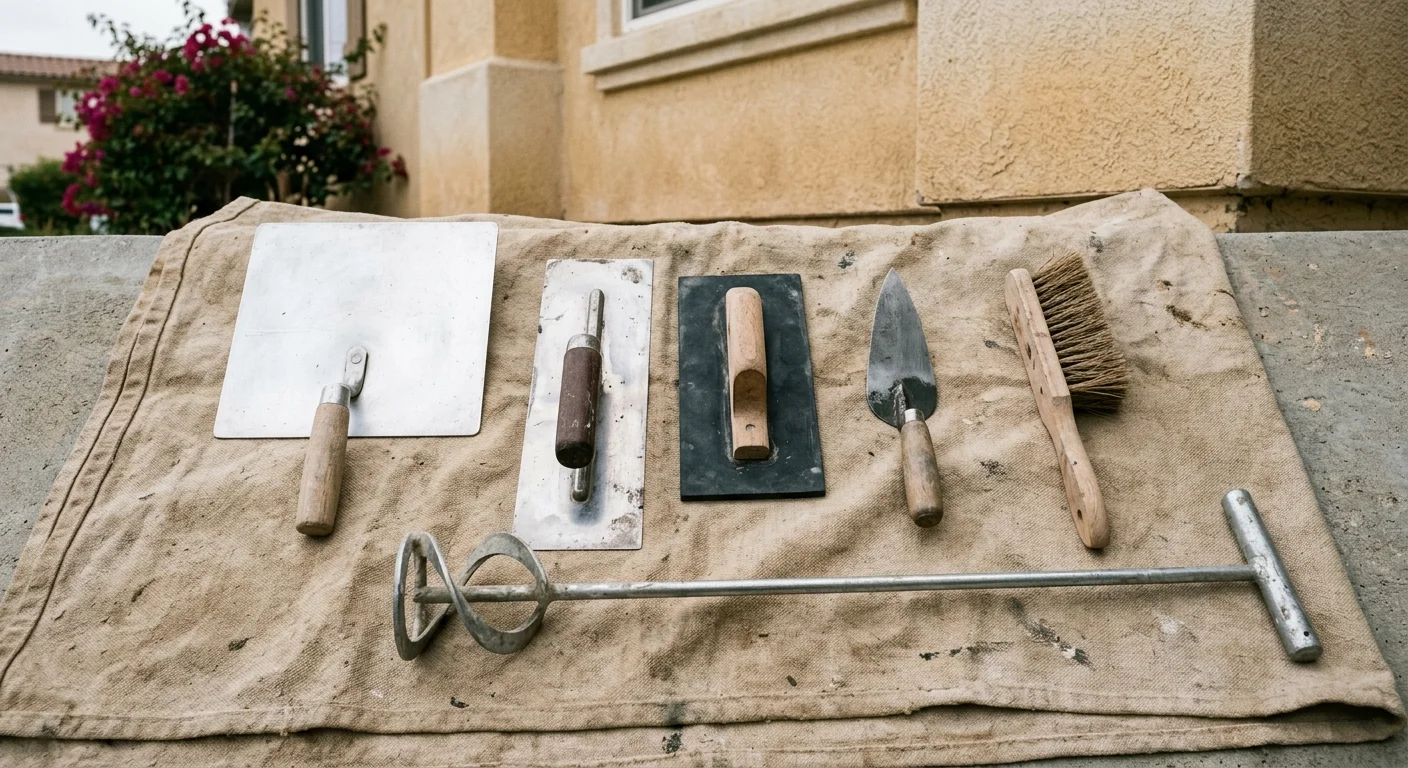
Start with a margin trowel, finishing trowel, hawk, float, mixing bucket, and paddle. Add a stiff brush, scraper, sponge, drop cloth, and a separate water container. The product label may require more equipment, so read it before buying anything.
A margin trowel fits tight areas and moves material from the bucket. The hawk holds a workable amount near the wall. The finishing trowel spreads and shapes the patch. A float helps soften trowel marks and develop the surface texture.
This list assumes the damage stops near the surface. It doesn’t cover exposed lath, failed mesh, recurring moisture, or a loose area extending beyond the visible opening. Those conditions change both the repair and the tools.
Buy tools after identifying the wall system and finish. Traditional stucco and EIFS aren’t repaired with the same material package. Our guide to stucco repair materials in San Diego explains the material side of that decision. For a defined opening with sound surrounding material, see how professional stucco patching is approached.
Hawk and trowel: what they do and why beginners fight them
A hawk is a flat board with a handle underneath. It keeps fresh material close to the working area. A trowel picks up that material and presses it onto the wall.
The awkward part is coordinating both hands. Tip the hawk too far and material slides off. Hold the trowel at the wrong angle and it either scrapes the patch bare or leaves a heavy ridge. That coordination comes from practice, not a more expensive tool.
Choose a hawk you can hold steadily when loaded. A margin trowel is easier for transferring small amounts. A broader finishing trowel covers more wall but can feel clumsy around a narrow patch.
Keep the trowel face clean as you work. Dried pieces can drag through fresh material and leave grooves. Don’t scrape those grooves endlessly. Repeated passes can disturb a surface that was already close.
Practice the pickup motion over a covered floor before approaching the wall. Then make a sample patch on scrap backing. That reveals whether the trowel size and material consistency feel manageable.
Floats and the finish they produce
A float shapes the surface after the material has been placed. Wood, rubber, and sponge floats don’t leave identical results. The correct choice depends on the existing finish and the repair product’s instructions.
A float isn’t an eraser for every texture problem. It can blend high spots, soften trowel lines, and move surface material. It can also flatten texture that should remain pronounced. Pressure and timing change the appearance.
San Diego homes carry many finishes, from smoother walls near central neighborhoods to heavier patterns across older suburban tracts. Don’t identify a finish from memory alone. Look at the wall in direct and angled light, then photograph both the damaged area and an undamaged section.
Make a sample before touching the final patch. Try the float with light pressure first. If the surface needs more movement, adjust on the sample. This costs less effort than removing a mismatched patch.
When the surrounding pattern is hard to read or reproduce, texture matching is often the real challenge. Color can be addressed later. A visibly different texture usually remains noticeable under the same light.
Mixing: bucket and paddle versus a mixer, and when it matters
A clean bucket and mixing paddle suit many small repair products. The paddle must fit both the bucket and the drill or driver specified for it. A separate measuring container helps keep each batch consistent.
Follow the product label for water, mixing sequence, rest periods, and usable working time. Those directions vary. Don’t copy a ratio from another bag or a general video.
A larger mixer becomes relevant when the repair requires more material than a small bucket can handle comfortably. That point isn’t a universal quantity. It depends on the product, application, equipment, and person handling the material. Larger batches also need a plan for placement before mixing begins.
Clean tools between batches. Material left on a paddle or bucket wall can break loose into the next mix. Keep mixing tools separate from texture tools so every item has one clear job.
Don’t add water just because a batch feels harder to spread. Check the label first. An incorrect mix can change how the material handles and finishes. If the product directions and wall conditions don’t line up clearly, stop and ask the manufacturer or a licensed stucco contractor.
Cutting out and prep tools
Repair preparation may call for a scraper, stiff brush, masonry chisel, hammer, or an appropriate cutting tool. The goal is a controlled opening with stable edges, not the largest possible hole.
Start gently. Remove material only where the repair plan calls for removal. Aggressive cutting can reach lath, mesh, flashing, trim, or other concealed components. Those discoveries change the job.
A brush removes loose debris from the prepared area. A scraper helps test questionable edges without immediately reaching for a power tool. Use a vacuum or collection method permitted by the equipment and product instructions. Protect nearby windows, doors, plants, paving, and painted surfaces before debris starts falling.
Power cutting tools shouldn’t be a default purchase for one patch. They require the correct wheel or blade, suitable controls, and careful depth management. Read every tool instruction before use.
Stop if the opening reveals corrosion, torn building paper, soft backing, or damage beyond the visible patch. Surface filler won’t address a deeper assembly problem. A licensed pro can determine which layers need attention.
Texture tools, including the improvised ones that actually work
Texture tools can be purpose-built or ordinary items reserved for the job. Depending on the existing pattern, a float, sponge, stiff brush, whisk broom, small roller, or texture brush may help create a useful sample.
The key word is sample. An improvised tool only works when its test pattern matches the wall. A sponge that suits one sand-like surface can look stamped on another. A brush can leave obvious lines when the surrounding texture is random.
Study a clean, undamaged section near the repair. Notice the pattern’s direction, spacing, raised areas, and flatter pockets. Check it from several angles because San Diego’s strong exterior light can expose ridges that look subtle in shade.
Use the same hand motion across each sample. Change one variable at a time, such as pressure or tool type. Label the samples so you can repeat the closest result.
Don’t rely on color to hide a poor match. Texture changes how light falls across the wall. For difficult finishes, a broader blending area may be considered by the contractor instead of forcing the entire transition into the opening.
Lath and mesh tools if the repair goes that deep
Visible lath or mesh means the job has moved beyond a simple cosmetic fill. Tools may include snips, appropriate fastener tools, pry tools, and equipment for controlled removal. The exact set depends on the wall assembly.
Don’t treat every mesh as metal lath. Different exterior systems use different layers and repair materials. Cutting first and identifying later can turn a small opening into a complicated repair.
Fasteners aren’t interchangeable either. Their type, placement, and compatibility must come from the applicable repair instructions and wall conditions. Those details couldn’t be confirmed as one universal rule. Check the system manufacturer’s documents or ask a licensed stucco contractor.
The same caution applies to material behind the lath. If a concealed layer is torn, displaced, wet, or missing, adding surface material doesn’t answer what caused the condition.
Take clear photos before covering anything. Include a wide view, close view, and nearby edges or penetrations. If professional lath replacement is needed, those images can help explain what was uncovered without pretending to provide a diagnosis.
Safety gear that is not optional with cement products
The product label and safety data sheet set the starting point for protective equipment. Read both before opening, mixing, cutting, or sanding any material. Don’t guess based on another product with similar packaging.
Gather the eye, skin, hearing, and breathing protection specified by those instructions. Make sure each item fits and is suitable for the task. If a label calls for equipment you don’t understand or can’t use correctly, pause the project.
Tool instructions matter too. A drill with a mixing paddle behaves differently from a hand trowel. Cutting equipment adds another set of directions. Keep cords, hoses, buckets, and drop cloths arranged so the work area remains controlled.
Protect other people and pets from the work zone. Store unopened and mixed products according to their labels. Don’t move an unlabeled mixture into a food or drink container.
There isn’t one safe gear list for every stucco product and repair method. The manufacturer sets product-specific instructions. A licensed contractor should handle the work when the required controls, access, or protective equipment exceed your setup.
Water: the tool nobody lists
Water affects mixing, surface preparation, cleanup, and tool control. Treat it as a measured part of the setup, not something added casually from the nearest hose.
Keep one clean container for measured mixing water. Use another source for washing tools. This prevents dirty cleanup water from entering a new batch. Follow the repair product’s label for the allowed quantity and sequence.
Some products or conditions may call for surface dampening. Others may have different preparation directions. There isn’t one verified rule that fits every repair material. Read the label and any system documentation before wetting the wall.
A spray bottle, clean sponge, or adjustable hose nozzle can provide controlled application when the instructions allow it. Avoid flooding the opening or nearby wall. Water moving behind the surface can hide where it went.
Plan cleanup before mixing. Know where tools will be washed and how leftover material should be handled under the product directions. Don’t wash cement-based residue into a storm drain or landscape without first confirming the correct disposal method with the local authority responsible for waste where you live.
What you would still be missing that a pro brings
Buying the tools doesn’t provide diagnosis, material compatibility, or texture judgment. A licensed stucco contractor brings experience reading the layers around the opening and deciding where a repair should stop.
That matters when damage returns, the wall sounds loose beyond the patch, or lath and concealed layers are exposed. It also matters around windows, doors, roof intersections, foundations, and wall penetrations. Those transitions can demand more than a surface tool kit.
Access is another dividing line. A ground-level patch and an upper-story repair don’t present the same setup. A pro can select suitable access equipment, containment, mixing capacity, and finishing tools for the actual wall.
Before hiring, verify the contractor through the official CSLB license check. Ask who will perform the work, what wall layers are included, and how texture matching will be evaluated. Permit requirements depend on the scope and location, so confirm them with the city or county that issues permits for your property.
Stucco Pro SD makes the connection. The independent contractor evaluates and performs the physical work.
When to call us
Call when damage reaches lath, returns after patching, or needs a careful texture match. Those conditions deserve an evaluation from a licensed stucco pro. Call us at (858) 400-4352 and we’ll connect you with a licensed local stucco contractor.