The right caulk for stucco repair is an exterior sealant labeled for stucco or masonry and the adjoining material. It belongs at joints, gaps, and penetrations that need to accommodate movement. It usually isn’t the right repair for a crack running through the open field of a stucco wall.
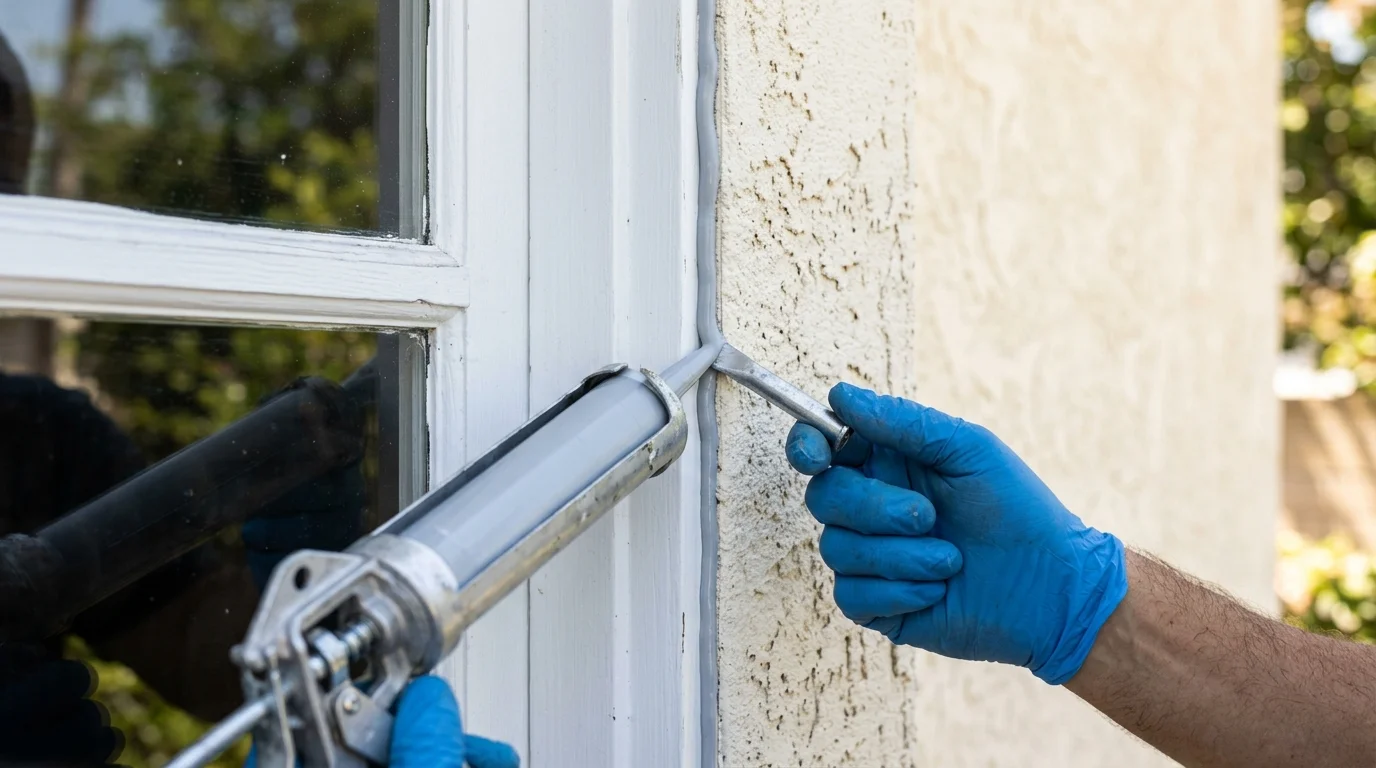
The one thing caulk is good at on a stucco wall
Caulk is best used to seal an intentional gap between adjoining surfaces. Common examples include the perimeter of a window frame, a pipe penetration, or a joint between stucco and another cladding material.
Those locations aren’t the same as the broad face of the wall. The materials meeting there may respond differently to sun, temperature, and building movement. A compatible sealant can stay within that joint instead of turning it into a rigid patch.
The product label matters more than the word “exterior” on the front. Check whether the manufacturer lists stucco or masonry as an approved substrate. Then confirm that it also lists the other surface, such as painted metal, vinyl, wood, or concrete.
Caulk isn’t textured stucco in a tube. It won’t recreate the wall’s base material, finish texture, or color pattern. If material is missing from the wall, a proper stucco patching process may be a better fit.
Joints that are designed to move: penetrations, control joints, dissimilar materials
A useful starting point is identifying what you’re looking at. A narrow gap where a window frame meets stucco is different from a random diagonal crack across the wall.
Sealant may belong around certain pipes, vents, doors, windows, and other penetrations. It may also appear where stucco meets concrete, trim, or another wall finish. Before applying anything, confirm that the selected product is approved for both adjoining materials.
Control joints need more care. Their shape and location are part of the wall system, so they shouldn’t be covered as if they were accidental cracks. Filling across the joint can hide its edges and interfere with its intended form. Our guide to stucco control joints explains how to recognize them.
Look closely before scraping or filling an existing joint. A deliberate, straight joint usually tells a different story than a branching crack. If the original detail isn’t clear, have a licensed stucco contractor inspect it first.
Why caulking a crack in the field of the wall is usually the wrong move
A crack in the middle of a stucco wall needs diagnosis before filling. Caulk may cover the line without addressing loose material, a damaged finish, or movement below the visible surface.
The result can also look conspicuous. Smooth sealant laid across a sand, lace, or skip-trowel finish often creates a shiny stripe. Painting may change its color, but paint doesn’t reproduce the surrounding texture.
Start by noting the crack’s path and nearby conditions. Check whether it returns after previous work, reaches a corner, crosses a patch, or sits beside staining. Don’t widen, cover, or inject the crack until the repair method is clear.
Our stucco crack repair service connects San Diego County homeowners with licensed local contractors who can assess the wall. The contractor can determine whether the opening calls for sealant, a stucco repair material, or work beyond the visible finish.
Sealant families and what the differences mean outdoors
Store shelves group many different products under “caulk.” You’ll commonly see acrylic latex, silicone, polyurethane, and hybrid or modified-polymer sealants. A family name alone doesn’t confirm that a specific tube belongs on your wall.
Read the technical data and application instructions for the exact product. Look for clear approval for exterior use, stucco or masonry, and the adjoining surface. Also check the manufacturer’s limits for joint size, temperature, moisture, primer, tooling, and coating.
Don’t assume every silicone product behaves alike. The same applies to acrylic, polyurethane, and hybrid labels. Formulas, approved surfaces, and painting instructions can differ between products from the same manufacturer.
For a painted Clairemont wall, paintability may guide the choice. At an unpainted joint in Chula Vista, color and appearance may carry more weight. A sun-facing wall in El Cajon may also present a different exposure than a shaded coastal wall. The product manufacturer and the contractor doing the repair should confirm suitability for that exact location.
When the label doesn’t name the substrate, don’t treat silence as approval. Contact the manufacturer or choose a product with written instructions covering the materials involved.
Paintability and why it decides the product for you
If the joint will be painted, the sealant must be labeled paintable. Don’t rely on a store shelf tag or the color shown on the tube. Check the exact product’s instructions for compatible coatings and preparation.
Paintability doesn’t guarantee a hidden repair. A smooth bead can remain visible against textured stucco, even after both surfaces share one color. Heavy paint also shouldn’t be used to disguise poor joint shape or failed adhesion.
Plan the finish before choosing the sealant. Decide whether the wall will keep its existing color, receive paint, or need a stucco finish repair. Our guide to preparing stucco for repainting covers the broader wall preparation process.
If you’re unsure about coating compatibility, test the complete system in a small, inconspicuous area. Follow the sealant and coating manufacturers’ written directions before proceeding.
Surface prep on a porous, textured, dusty wall
Stucco texture creates peaks, pockets, and loose surface dust. A bead placed over debris isn’t making direct contact with a firm surface. Old sealant, peeling paint, and crumbling stucco can also interrupt the joint.
Follow the product instructions for cleaning and surface condition. Don’t improvise with solvents or primers that aren’t named by the manufacturer. If the instructions call for a dry substrate, don’t seal over trapped moisture simply because the surface looks dry.
Remove only material that can be handled without damaging the adjoining stucco or frame. Masking both sides can help define the bead on coarse texture. A small test area also shows how the product tools and whether it stains or darkens the surrounding finish.
Stop when the joint edges are weak, soft, or breaking apart. Sealant can’t restore a sound bonding surface where the wall material itself is failing. That condition belongs in the repair conversation.
Joint geometry: depth, width and why a deep bead fails
A sealant joint isn’t improved by filling the entire hidden cavity with material. Every product has written limits for joint width, depth, and application shape. Those limits should determine how the joint is prepared.
Some joint systems use backer material to control depth and support the intended bead shape. Don’t add it automatically. Confirm that the selected sealant’s instructions allow it, then use the type and placement specified by the manufacturer.
A deep, uncontrolled bead can behave differently from the joint shown in the product instructions. It may also waste material while leaving the visible edges poorly formed. Adding more sealant doesn’t correct dirty edges, weak stucco, or an incompatible substrate.
Measure the opening instead of judging it from across the patio. If its dimensions fall outside the published range, don’t stack several passes and hope they become one joint. Ask the manufacturer or a licensed contractor for the proper system.
What a failed caulk joint looks like a year later
A failing joint often becomes visible at its edges. The bead may pull away from one side, split through the middle, wrinkle, discolor, or separate from nearby paint. Dirt collecting along an open edge can make the gap easier to see.
The failure pattern offers clues, but it isn’t a complete diagnosis. Separation from one surface may point toward poor preparation or incompatible materials. A recurring split may indicate that the joint and product weren’t suited to each other. Confirm the cause before laying a fresh bead over the old one.
Don’t keep building layers over failed sealant. The next application still depends on firm, compatible joint edges and the manufacturer’s required preparation.
Photograph the joint before disturbing it. Include the entire window, door, penetration, or wall transition. That wider view can help a contractor understand where the joint sits and what surrounds it.
Caulk as a symptom-hider on a wall with a water problem
Caulk can hide an opening while leaving the moisture source unresolved. Staining, softened finishes, peeling coatings, repeated cracks, or damp interior areas call for a broader inspection.
Water may be entering somewhere other than the visible mark. Sealing the easiest line can redirect attention without proving where the moisture started. Don’t describe a bead as waterproofing unless the product and complete wall system support that use.
Our waterproofing and moisture barrier service connects homeowners with licensed local stucco contractors. They can inspect the visible finish along with related wall details and discuss the appropriate repair scope.
This matters across San Diego County. A coastal home near Encinitas and an inland home near Santee can have different wall exposures. Neither location identifies the cause by itself. The wall still needs to be evaluated on its actual condition.
Where the sealant conversation ends and repair begins
Sealant selection stops being the main issue when the surrounding stucco isn’t sound. Loose areas, missing material, bulging surfaces, repeated cracking, or widespread coating failure need more than a new bead.
The same applies when the joint’s purpose can’t be identified. Don’t fill a straight wall joint, drainage opening, or assembly detail merely because it looks unfinished. A licensed stucco contractor can identify the wall condition and recommend a repair method.
Permit requirements depend on the scope and the city or county that issues permits where the property sits. Confirm the current requirements with your local building department before work begins.
Before hiring, verify the contractor through the official California Contractors State License Board license check. Stucco Pro SD is a referral service. We connect homeowners with licensed independent local pros and don’t perform the physical work.
When to call us
Call when the crack keeps returning, the joint edges are damaged, or moisture may extend beyond the visible gap. A licensed stucco contractor can inspect the condition and determine where sealant ends and wall repair begins.
Call us at (858) 400-4352 and we’ll connect you with a licensed local stucco contractor.