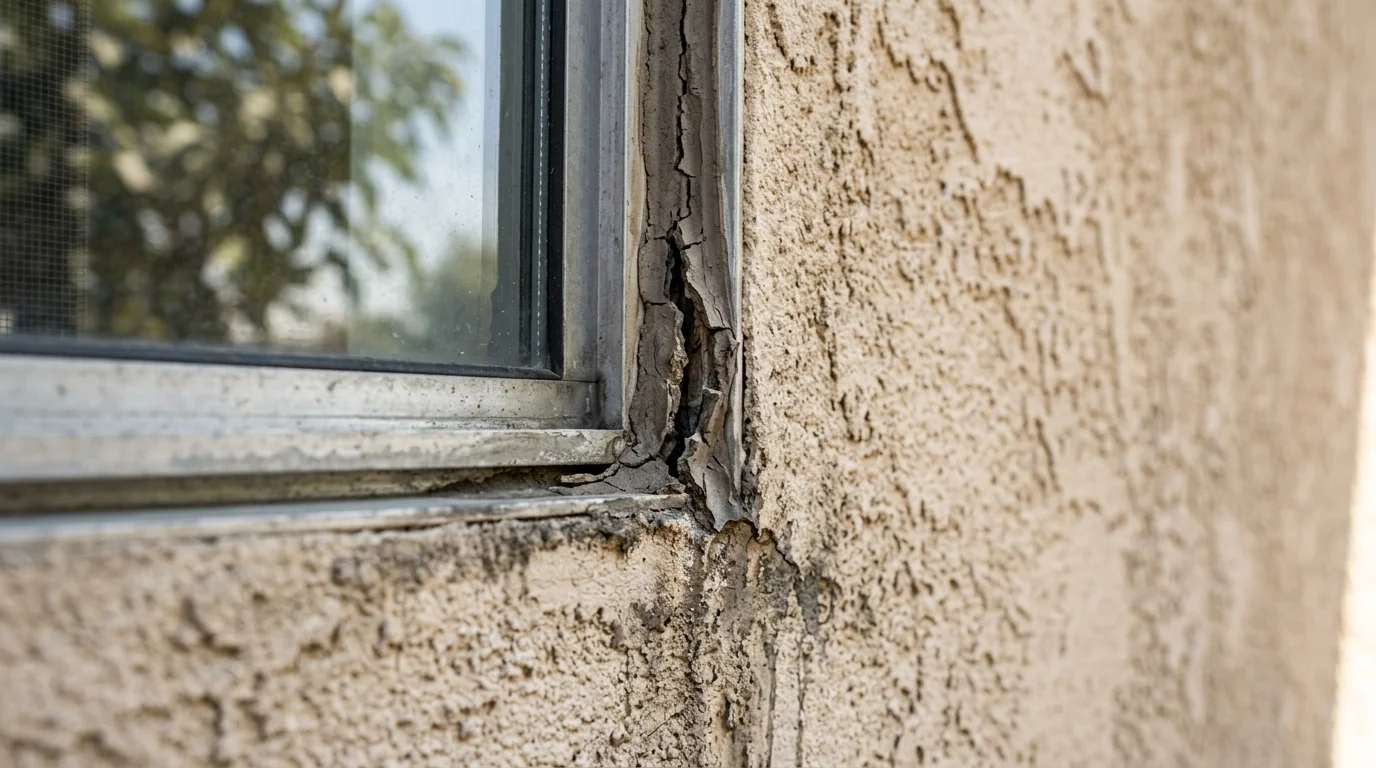
EIFS joints are planned gaps and sealed transitions within a synthetic stucco exterior. When one cracks or separates, water may reach parts of the wall that should stay protected. The visible joint identifies where an inspection should begin, not how far any damage extends.
Why a foam-clad wall needs joints in the first place
An EIFS wall meets window frames, doors, vents, pipes, trim, and other materials. Joints create defined transitions between those surfaces. They also break a large elevation into sections where the approved system calls for separation.
The finish may look continuous from the sidewalk. That doesn’t mean every line in the wall serves the same purpose. One gap may continue through part of the assembly. Another may only seal the edge around an opening. A groove made for appearance can resemble both.
That distinction matters during repair. Filling every visible line with a generic caulk can cover the symptom without restoring the intended detail. Cutting a new line based only on appearance can also disturb material that wasn’t meant to be opened.
Start by identifying the wall system and the joint’s role. Plans, product records, and exposed details may help. When those aren’t available, a contractor must read the surrounding construction carefully.
Exposure matters too. A sheltered Chula Vista courtyard and a west-facing Point Loma wall won’t collect water in the same way. The useful question is which joints receive water, where runoff travels, and how the nearby surfaces behave.
Expansion joints, and where the system requires one
The exact expansion-joint layout can’t be confirmed from a general article. It depends on the building, the EIFS system, and the documents governing that installation. A licensed contractor should compare the visible layout with available plans and system details.
During an inspection, attention often goes to long uninterrupted walls, changes in building shape, floor lines, corners, and places where different materials meet. These locations aren’t automatic proof that a joint is missing. They’re simply useful places to compare the wall with its intended design.
A true building joint also shouldn’t disappear beneath a rigid patch without investigation. If a separation continues through the structure, covering its face may move the visible failure somewhere nearby. The new crack can then look unrelated to the original repair.
Follow each suspect line across the elevation. Note whether it stops at an opening, turns a corner, or continues between floors. Photograph both ends and any nearby cracking.
If a repair may affect permitted construction, ask the city or county that issues permits for that address. The local building department determines what review is needed. Don’t rely on a neighboring project or an old online discussion as proof for your property.
Sealant joints at windows, doors and every penetration
Windows, doors, vents, pipes, lights, and similar penetrations interrupt the EIFS surface. The edge condition around each opening deserves close attention because several materials meet there.
Look for a continuous sealant line where the approved detail calls for one. Then inspect the sealant itself. It may be pulling from the frame, splitting through its center, cracking at a corner, or separating where two beads meet. Paint can hide these edges without fixing them.
Corners deserve a slower look. A bead may appear intact across the top of a window but open near one end. Trim can also conceal a gap until staining appears below it.
Don’t assume every penetration uses the same joint shape or sealant. Compatibility and placement depend on the specific wall system and adjoining material. The product label alone doesn’t confirm that the entire detail is correct.
Check the frame and nearby finish together. A sound-looking bead beside loose, stained, or swollen material still calls for investigation. For more context on the broader repair sequence, see how to repair EIFS.
Backer rod: the detail most failures trace back to
Backer rod is the compressible material sometimes placed behind a sealant bead. You usually can’t see it unless the joint opens or the old sealant is removed.
Its presence alone doesn’t prove the joint was built correctly. A contractor must evaluate the joint’s depth, shape, side surfaces, and the materials behind it. The approved detail for that EIFS system remains the reference.
A bead that sinks deeply into a gap may suggest missing or displaced backing. A thin smear across the face may show that the joint was covered instead of rebuilt. Neither observation confirms the hidden condition.
Don’t pull loose sealant from the wall just to check underneath. That can enlarge an opening and expose more of the edge. Photograph the area and let the contractor decide how to examine it.
When resealing is appropriate, preparation matters as much as the visible bead. The scope may include removing failed material, cleaning the bonding surfaces, replacing unsuitable backing, and applying a compatible sealant. Ask the contractor to explain those steps in writing. A vague promise to “caulk it” doesn’t identify what will happen beneath the finished surface.
What a joint looks like when the sealant has aged out
Failed sealant doesn’t have one universal appearance. Some beads pull cleanly away from the window or joint edge. Others split through the middle, become rigid, wrinkle, or break into short sections.
Look closely at changes in width and texture. An open corner, ragged edge, or visible gap behind the bead deserves attention. So does sealant that moves independently when the surrounding finish remains still.
Fresh material can hide an older failure. Watch for thick beads placed over dirty edges, peeling paint, or layers of sealant with different colors. Those conditions don’t reveal whether the joint was cleaned and rebuilt.
There’s no confirmed calendar age that tells a San Diego homeowner when every EIFS joint will fail. Exposure, materials, installation, and adjoining surfaces differ. Judge the observed condition and the approved system detail instead.
Take clear photographs from the same position. Include the entire opening and a close view of the defect. If the appearance changes after rain, record that change without assuming the joint caused it. That timeline gives the contractor better evidence than a single close-up taken after the wall has dried.
Staining, streaking and swelling below a joint
A dark streak beneath an EIFS joint is a clue, not a diagnosis. It shows where water or residue has traveled across the visible surface. It doesn’t prove where that water entered.
Trace the mark upward before focusing on its darkest point. Check nearby window corners, ledges, roof edges, pipes, and changes in wall shape. Irrigation, surface dirt, and runoff can produce patterns that resemble a leaking joint.
Swelling, bulging, softness, or a changed texture deserves closer inspection. Compare the suspect area with an unaffected part of the same elevation. Don’t press hard or puncture the finish to test it yourself.
Cleaning or painting first can erase useful evidence. Photograph the pattern, note when it appeared, and keep the surrounding area visible for the inspection. If possible, include a wider image showing what sits above the stain.
San Diego properties can have very different exposure from one elevation to another. A stain on an Oceanside wall shouldn’t be blamed on coastal location alone. A contractor still needs to trace the actual path and assess the wall assembly.
Why a joint failure shows up as damage somewhere else
The first visible stain may sit below or beside the failed EIFS joint. Water can follow edges, openings, and concealed paths before reaching a place where it becomes visible.
That’s why patching only the stained spot may miss the entry point. The lower area could be showing the result while an upper window corner, penetration, or transition remains open.
A good inspection maps relationships. It follows vertical and horizontal lines, checks what lies above the symptom, and compares nearby openings. Interior discoloration may also need to be considered, but it shouldn’t be treated as proof of one exterior cause.
This broader view separates cosmetic work from moisture-related repair. Waterproofing and moisture-barrier work may be part of the scope when the affected assembly extends beyond the sealant bead. The contractor should explain what evidence supports that recommendation.
Avoid accepting a diagnosis based only on a photograph of the stain. A photo can identify the inspection area. It can’t confirm concealed material conditions or show where an unseen path begins and ends.
Probing and moisture readings around a suspect joint
Inspection should begin with the least disruptive methods. A contractor can document cracks, open edges, soft areas, stains, and changes around nearby penetrations. Moisture readings may then help compare the suspect location with surrounding areas.
A reading isn’t a complete diagnosis by itself. Surface conditions, materials, and meter settings can affect what appears on the display. Ask what the reading represents, where control readings were taken, and how the results changed the inspection plan.
Probing or opening the wall is more invasive. The contractor should identify the proposed location, the reason for opening it, and how the test area will be repaired. Random holes can damage the finish while producing little useful information.
A clear record should connect each test to a visible concern. Photos, marked elevations, and written findings make that connection easier to review. They also help prevent a small investigation from becoming an undefined repair project.
For suspected concealed damage, seek a licensed contractor familiar with EIFS repair. You can confirm a contractor’s status through the official CSLB license check.
What resealing involves and what it will not fix
Resealing can address a failed joint when the surrounding assembly remains suitable for repair. The exact process depends on the EIFS system, adjoining materials, and condition found after removal.
The work may include removing failed sealant, cleaning the joint edges, correcting unsuitable backing, and placing compatible replacement material. Ask which product and system detail guide the work. A surface bead placed over loose or contaminated material isn’t the same scope.
Resealing won’t repair damaged insulation, loose finish, deteriorated backing, or another concealed problem. It also won’t correct a missing transition elsewhere on the wall. Those conditions require their own diagnosis and repair plan.
Color and texture may remain visible after a sound joint repair. Sealant, window frames, and EIFS finish don’t always weather alike. Decide whether the goal is stopping an opening, repairing damaged material, improving appearance, or all three.
The written proposal should distinguish joint work from wall repair. It should state what will be removed, what will remain, and how unexpected damage will be handled. That clarity matters more than a broad promise that the wall will simply be sealed.
Deciding between a resealed joint and opening the wall
A resealed joint may be reasonable when inspection shows a localized sealant defect and no evidence requiring a wider repair. The contractor should still confirm that the adjacent EIFS edges can accept the planned work.
Opening the wall becomes a stronger consideration when staining returns, the surface feels soft, swelling is visible, readings differ meaningfully from comparison areas, or the suspected path can’t be traced. These signs don’t prove concealed damage. They explain why surface work alone may leave unanswered questions.
Ask the contractor to separate confirmed findings from possibilities. The proposal should identify the investigation area and the stopping point. It should also explain how any opening will be closed if the concealed materials appear sound.
Don’t choose solely by which option disturbs less finish. A small reseal isn’t economical if the real problem remains. A large opening also isn’t justified without a clear reason and defined scope.
The best decision comes from evidence gathered at the property. Building shape, exposure, joint layout, and previous repairs all matter. An online photo can help start the conversation, but it can’t settle what’s happening behind the finish.
When to call us
Call when an EIFS joint is cracked, separating, stained, swollen, or tied to recurring interior or exterior moisture signs. We serve San Diego County by matching homeowners with licensed independent stucco pros who can inspect the affected assembly. Call us at (858) 400-4352 and we’ll connect you with a licensed local stucco contractor.