A convincing EIFS texture match starts with the aggregate, then depends on application and color. A patch can look close from the sidewalk yet stand out in afternoon light. San Diego’s strong sun makes small differences especially easy to see.
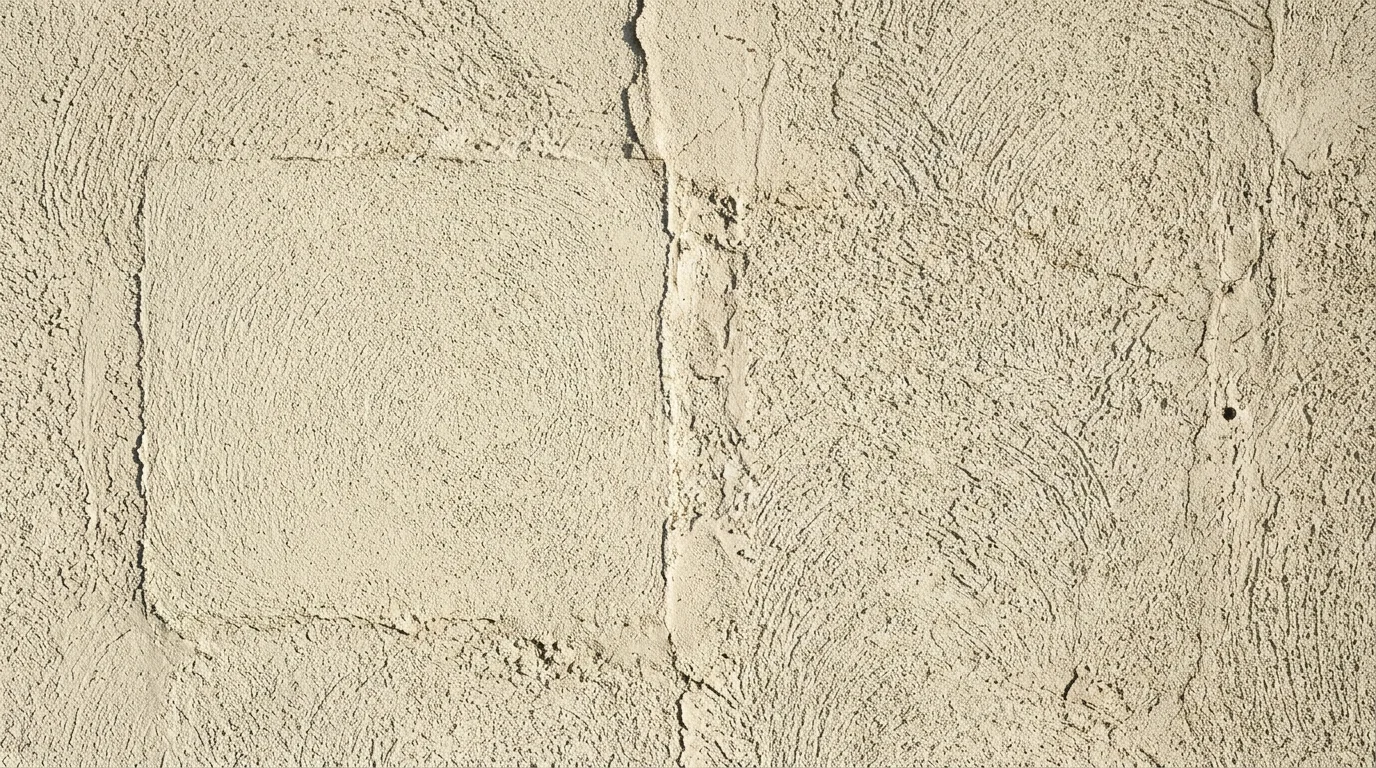
Why an EIFS finish is a different material from a cement finish coat
EIFS texture comes from a synthetic finish applied over an exterior insulation and finish system. Traditional stucco gets its appearance from a cement-based finish coat. Both can look sandy or troweled, but they aren’t the same material.
That distinction matters during a repair. A cement finish selected only because its texture looks similar may behave differently during application. Its color, grain, and surface character can also read differently once dry. The repair material should fit the existing wall system, not just resemble it in a sample photo.
Start by confirming what’s already on the building. Original construction records, product labels, prior repair documents, or a knowledgeable contractor may help. Don’t identify EIFS from color alone. Painted cement stucco and synthetic finishes can resemble each other from several feet away.
The repair also needs more than a matching decorative surface. Damage beneath the visible finish may affect how the patch must be prepared. Our EIFS repair service connects homeowners with licensed local pros who can inspect the affected area and identify the existing assembly.
If you’re comparing the materials themselves, read our guide to acrylic and cement stucco finishes. Knowing which finish you have keeps the matching process focused on the right product family.
The common synthetic finish textures and what each one is called
Synthetic finish names aren’t always consistent across product lines. One manufacturer’s fine finish may resemble another company’s sand or float finish. That’s why the name on an old invoice helps, but a physical sample is more useful.
Most EIFS texture conversations begin with aggregate appearance. Fine finishes have a tight, closely packed grain. Medium finishes show a more obvious sandy pattern. Coarser finishes create deeper shadows and a more pronounced surface. Those broad descriptions help narrow the search without pretending every manufacturer uses identical labels.
You may also hear terms such as sand, float, freestyle, swirl, or rilled. These names describe the visual pattern or the motion used to create it. A freestyle surface may show irregular trowel movement. A rilled or grooved surface has more visible directional marks. The exact label should be checked against the finish manufacturer’s current samples.
Photos alone can distort these differences. Phone sharpening can make fine aggregate look coarse. Flat lighting can hide grooves that become obvious near sunset. A close sample viewed under raking light gives a contractor better information.
The goal isn’t merely finding a familiar texture name. It’s identifying the aggregate, pattern, and application method that produced the existing wall.
Aggregate size: the single thing that decides whether a patch disappears
Aggregate is the visible grain within the finish. Its size and grading control how tightly the surface packs and how it catches light. If that grain differs, matching the color won’t make the patch disappear.
A finer patch beside a coarser wall usually looks flatter. A coarser patch on a fine wall throws stronger little shadows. The contrast becomes clearer when sunlight moves across the wall from the side. It can remain noticeable even when both areas share a similar color.
Aggregate should be compared directly against the existing finish. Contractors may examine the wall from several distances, then compare physical samples. The surrounding surface matters more than a product photograph or a texture name printed online.
Repairs can also fail visually when the correct aggregate is handled incorrectly. Too much pressure may flatten the grains. Too little movement may leave excess material. A sample can therefore use the right product and still miss the wall’s appearance.
When possible, preserve a clean fragment from the damaged area. It may provide a useful reference for texture and color. Don’t remove sound material solely to create a sample. A licensed contractor can decide where inspection or removal is appropriate.
Aggregate gets the patch into the correct visual family. Application technique determines whether it belongs there.
How the finish is applied and why the hand doing it shows
EIFS texture isn’t stamped onto the wall by the material alone. The applicator’s pressure, direction, timing, and tool movement shape the finished pattern. That’s why two patches made from the same container can look different.
A circular float motion can distribute aggregate differently from long, straight passes. Repeated movement may create visible swirls. Directional movement may leave lines that become stronger under raking light. Even a random-looking texture has a rhythm that a skilled applicator studies before starting.
The edge of the repair needs attention too. A hard ridge around a patch creates its own shadow. A broad, uncontrolled transition can disturb sound texture beyond the damaged area. The contractor has to balance the repair boundary with the intended blending plan.
San Diego homes also present different working conditions across a single elevation. A shaded wall in City Heights won’t look like a west-facing wall under late sunlight. The texture should be evaluated in the lighting that normally reveals it, not only while someone stands close to wet material.
This is skilled handwork. A test area lets the contractor adjust pressure and movement before committing to the visible wall. The closest match comes from copying both the material and the original application style.
Color is in the material, not on top of it
Many synthetic finishes receive color throughout the finish material. That means texture and color are placed together during application. The surface isn’t automatically treated like a neutral patch that will be hidden by a separate coat later.
Integral color creates a specific matching problem. The fresh mixture has to relate to the aged finish already on the wall. A color label from the original job can narrow the choice, but it doesn’t show how the existing elevation looks today.
Check whether the wall has been painted or coated since installation. A later coating changes the matching path because the visible color may no longer be the original finish color. The contractor needs to identify what’s on the surface before selecting the repair finish.
Texture also changes how color appears. A coarse surface creates more small shadows. A fine surface reflects light more evenly. Two samples made with a similar color can look different because their aggregate and tool patterns aren’t aligned.
For that reason, color shouldn’t be approved from a flat printed chip alone. Compare a textured sample to the wall. View it from close range and from the usual approach to the property. The strongest match treats color, aggregate, and application as one decision.
Why the sun fades a wall unevenly and what that does to a match
An exterior wall doesn’t age as one perfectly uniform color field. Different orientations receive different sunlight. Roof overhangs, trees, neighboring buildings, balconies, and trim can also shade only part of an elevation.
Those patterns matter during EIFS texture matching. A finish selected from an area beneath an overhang may appear wrong beside a more exposed section. Sampling from the opposite side of the building can create another mismatch, even when the original finish started with the same color.
San Diego’s varied settings make wall-by-wall comparison important. A coastal North County elevation, an inland East County wall, and a South Bay courtyard don’t share identical exposure. The contractor should match the actual repair area rather than rely on a countywide assumption about weathering.
Look for color changes around trim lines and protected corners. These areas may preserve a closer version of the original finish. They’re useful references, but the repair still has to relate to the visible field surrounding it.
Time of day can change the judgment. Midday light may flatten a texture. Late light can reveal every ridge and aggregate difference. A reasonable review includes the lighting conditions that make the existing wall’s pattern easiest to read.
Blending to a natural break instead of stopping mid-wall
A small patch placed in the middle of an open wall has nowhere to hide. Its perimeter can remain visible even when the texture and color are close. Carrying the finish to a natural break often produces a calmer result.
Natural breaks include inside corners, outside corners, trim bands, control joints, and changes in wall plane. These boundaries already interrupt the viewer’s eye. They give the finish a logical place to stop without creating a new shape across the field.
The right boundary depends on the building. A repair near a window may have nearby trim that contains the work. Damage centered on a broad, uninterrupted elevation leaves fewer options. In that case, the contractor may discuss refinishing a larger area rather than forcing a small blend.
Our texture matching service is designed for homeowners who need a licensed pro to evaluate those choices on site. The repair area, surrounding finish, and available stopping points all affect the plan.
Traditional stucco follows some similar visual principles, but its material behaves differently. Our guide to stucco texture matching in San Diego covers cement-based finishes separately. Keeping the systems distinct avoids treating every textured wall as the same surface.
Test patches and why a match is judged dry, not wet
Wet synthetic finish can look darker, smoother, or more uniform than it will later. Approving the match during application can give a false sense of accuracy. The sample needs to dry before its color and texture are judged.
A useful test patch copies the planned material, aggregate, tools, and hand movement. It should be large enough to show the pattern rather than one isolated trowel mark. Placing it where the wall’s normal lighting can reach it makes the comparison more meaningful.
Review the sample from several positions. Close inspection shows grain and tool marks. Stepping back reveals whether the patch forms a visible block. Side lighting exposes ridges that front lighting may conceal.
The sample should also be compared with the repair’s actual surroundings. Testing beside a protected corner won’t answer how the finish looks in the middle of an exposed wall. Color and texture need to work where the repair will remain.
A test patch doesn’t guarantee invisibility. It gives the homeowner and contractor a shared reference before a larger area is finished. If the sample misses, changing aggregate or application technique is easier before the visible elevation has been committed.
When matching is not realistic and the elevation gets refinished
Some existing finishes don’t provide a realistic path to a nearly invisible spot repair. The original product may be unknown. The wall may contain several older repairs. Its color may vary across the same elevation, or the texture may have been altered by later coatings.
In those cases, repeated small patches can make the wall look busier. Each repair introduces another edge, texture pattern, and color comparison. Extending a compatible finish across the elevation may produce a more unified appearance.
That decision should follow an on-site review. A contractor can compare the damaged area, surrounding finish, wall boundaries, and prior coatings. Ask what will be patched, where the new finish will stop, and how the proposed texture was selected.
No contractor should promise that every patch will become invisible under every lighting condition. A better conversation defines the expected result and identifies the conditions that could still reveal the repair.
Before hiring, confirm the contractor’s status through the CSLB license check. Stucco Pro SD is a referral service, not the contractor performing the work. We connect homeowners throughout San Diego County with licensed independent local pros.
When to call us
Call when an EIFS patch has a visible texture difference, an unknown finish, or no clean stopping point. A licensed stucco pro can identify the surface and discuss whether matching or broader refinishing makes sense. Call us at (858) 400-4352 and we’ll connect you with a licensed local stucco contractor.