Safe stucco cleaning in San Diego starts with identification, not pressure. Find out what marked the wall, test the gentlest suitable method, and stop if the finish changes. A dirty wall and a damaged wall need very different solutions. San Diego stucco cleaning searches often land on demolition or pressure-washing pages. This one is for washing a sound finish.
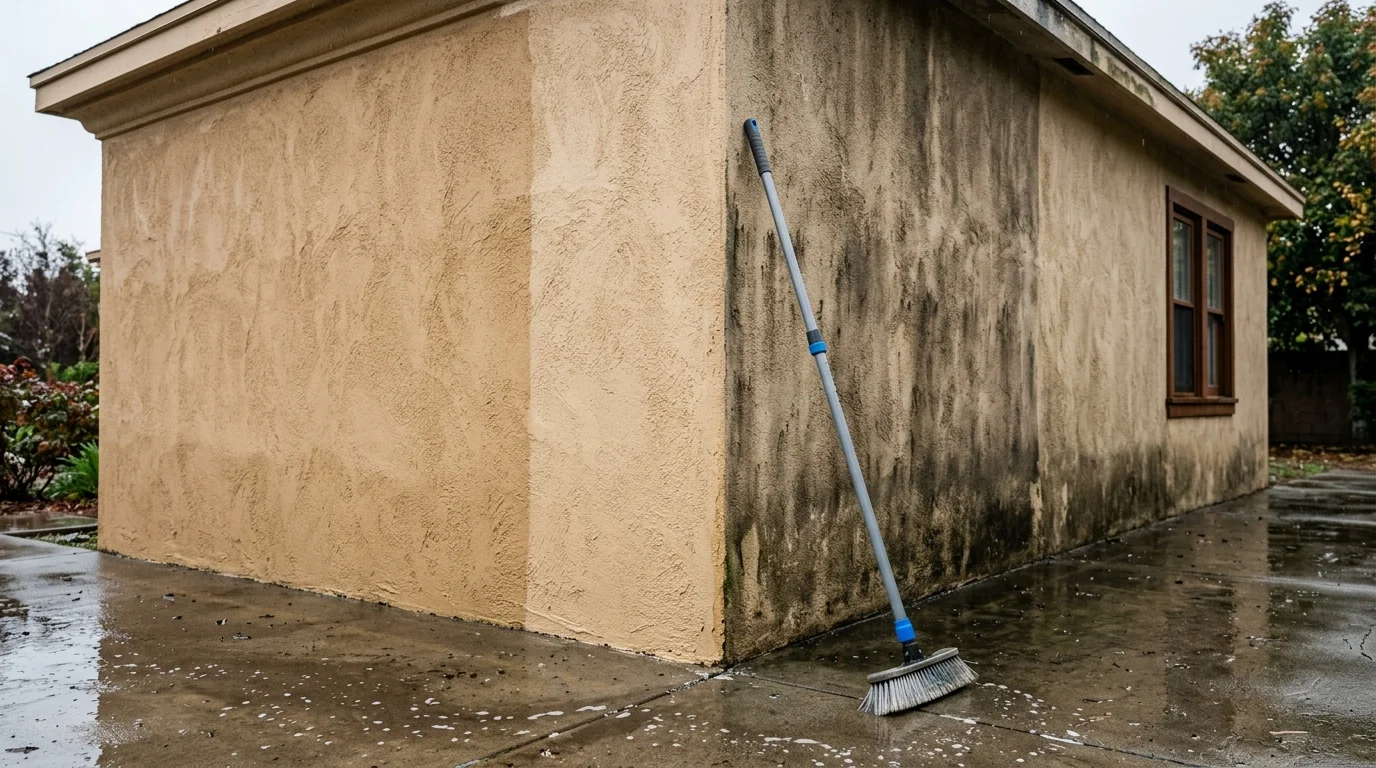
What is actually on the wall: dirt, algae, efflorescence, rust, or paint failure
Begin by looking closely at the stain while the wall is dry. Record its color, texture, location, and shape. Check whether it sits below metal, irrigation, a window, or a roof edge. Those details help a contractor separate a surface deposit from a wall problem.
Loose dust and grime may lift during a gentle test. Green or dark growth needs a cleaner labeled for that surface and growth type. A white, powdery deposit might be efflorescence, but appearance alone doesn’t confirm it. Compare the deposit with our guide to stucco efflorescence before choosing a treatment.
Orange or brown marks near metal may point toward rust staining. If the mark returns, cleaning the visible color hasn’t addressed its source. Peeling, bubbling, or chalky paint also isn’t ordinary dirt. Scrubbing harder could remove more coating without solving the failure beneath it.
Treat these labels as working categories, not a final diagnosis. Photograph the wall before wetting it. Include a wide view and a close view. A licensed stucco contractor can use that context when a stain resists cleaning.
Diagnose the stain before you pick the method
Divide the wall into manageable areas and inspect each one separately. One elevation may have a different finish, coating, or repair history. Don’t assume a method used on one wall belongs everywhere else.
Choose a small, inconspicuous test area. Start with plain water and minimal contact. Let the area dry before judging the result. Wet stucco can look darker, which makes an immediate comparison unreliable.
Watch the test area for altered color, exposed aggregate, loosened grit, or flattened texture. Stop if the cleaned patch no longer matches the surrounding finish. A brighter patch isn’t automatically a successful result when the texture changed with it.
Also note whether the stain follows a crack, seam, opening, or patched area. Cleaning shouldn’t become a substitute for evaluating those conditions. A method copied from an Oceanside property shouldn’t automatically be repeated in El Cajon. The finish and condition at the actual property control the decision.
If you can’t identify the surface, ask a licensed pro before applying a cleaner. The product manufacturer can also confirm whether its cleaner belongs on that specific finish.
Why pressure is the wrong first instinct on stucco
Pressure makes fast visual changes, but speed isn’t the main goal. The first goal is keeping the existing finish intact. Before testing, you don’t know how firmly its texture or coating remains attached.
There isn’t one pressure setting, nozzle, or working distance that fits every stucco wall. No universal safe setting could be confirmed for every finish. Equipment instructions, cleaner labels, and the wall’s condition must guide the setup.
A forceful pass can hide the difference between removed grime and removed material. That distinction becomes clearer after the wall dries. If the spray changes the texture, the cleaner has gone beyond cleaning.
Start with the lowest-pressure option available for the chosen process. Use a broad, controlled pattern on the test area. Don’t aim closely at cracks, penetrations, trim edges, or patched sections. Those areas deserve inspection before washing.
Pressure should never compensate for an unidentified stain. If gentle cleaning doesn’t move it, reassess the stain rather than increasing force.
What high pressure does to a sand or dash finish
Sand and dash finishes depend on their visible surface texture. Cleaning has gone too far when that texture becomes smoother, uneven, or visibly stripped.
Use the dry wall as your reference. Look across it from an angle, since side light makes surface changes easier to see. Mark any area that already looks loose or inconsistent before water touches it.
During a test, watch the runoff and the ground below. Visible finish material in the runoff is a reason to stop. So is a growing light spot that doesn’t match the shape of the original stain. A narrow clean line can also reveal that the spray pattern is too concentrated.
Don’t try to blend pressure damage by cleaning a larger area. That can turn a small test failure into an elevation-wide texture problem. Texture loss usually calls for evaluation, not more washing.
Previously repaired areas need separate attention. A patch may respond differently from the original finish beside it. When a clean patch exposes a mismatch, texture matching may be more appropriate than another cleaning pass.
Driving water into the wall instead of off it
The spray direction matters as much as its force. Water should travel down and away from the wall, not upward toward openings and joints.
Keep the spray controlled around windows, doors, vents, fixtures, and wall penetrations. Don’t use cleaning as a leak test. If water appears indoors, reaches an unexpected cavity, or remains around an opening, stop the work and document the location.
Cracks and open joints also change the decision. A stain near either condition may need repair before washing resumes. Sending more water at the area won’t explain where the opening leads.
Dampness that returns after the wall dries deserves a closer look. The cause can’t be confirmed from exterior color alone. A licensed contractor can evaluate whether the concern involves the finish, a joint, an opening, or another part of the wall.
When moisture is part of the concern, read about waterproofing and moisture barriers before treating the problem as surface dirt.
Soft washing and gentle mechanical cleaning
Soft washing generally describes a low-pressure approach that relies on a compatible cleaning product. The exact process still depends on the finish, coating, stain, and product label.
A soft-bristle brush may help on a tested area. Use light contact and small, overlapping strokes. Don’t grind the brush into raised texture. Rinse the test area, let it dry, and compare it with untouched stucco.
For a cleaning product, confirm that its label names the intended surface or coating. Follow the stated dilution, application, contact time, and rinsing directions. If those instructions aren’t clear, ask the manufacturer before using it.
No homemade chemical recipe could be confirmed as suitable for every stucco finish. Paint, cement-based finishes, acrylic finishes, and repaired areas may not respond alike. A recipe from a neighbor or video isn’t a substitute for the product label.
Work within a small test section first. Stop if the surface becomes tacky, chalky, discolored, or visibly different. Gentle cleaning is a controlled process, not a weaker version of pressure blasting.
Rinsing from the right direction and the right distance
Plan the rinse before applying any cleaner. Work in sections that you can reach and observe without rushing. Keep dirty water from drying across an area you’ve already cleaned.
Direct rinse water downward across the face. Avoid pushing it upward beneath edges or toward openings. Use a broad spray pattern and begin farther from the surface. Move closer only if the test area remains unchanged and the equipment instructions support it.
No single working distance fits every wall. The nozzle, equipment, texture, coating, and existing damage all affect the result. Let the test patch set the boundary, then keep your movement consistent.
Don’t hold the spray over one stubborn point. Repeated passes can change that spot before the surrounding wall responds. If the stain remains, return to diagnosis or change to a compatible product.
Allow the section to dry before making another pass. Daylight, wetness, and viewing angle can distort the comparison. A dry inspection gives you a better basis for deciding whether to continue.
Cleaning agents, dwell time and rinsing them off properly
Cleaning agents need a defined purpose. Choose one labeled for the identified stain and the exact surface. Don’t treat “exterior cleaner” as proof that a product belongs on every stucco finish.
Read the entire label before starting. The manufacturer sets the dilution, dwell time, protective steps, and rinsing method. Don’t guess those details. Don’t combine cleaners unless the written product directions expressly call for it.
Keep the product from drying on the wall unless its label permits that condition. Apply only to an area you can manage within the listed contact time. Rinse as directed, then inspect after the stucco dries.
Residue around trim, fixtures, or texture valleys means the rinse isn’t complete. Address it according to the label instead of adding another product. More chemistry can make the original stain harder to evaluate.
If cleaning is part of a repainting project, surface preparation continues after the wall looks clean. Our exterior paint preparation service explains when a licensed local pro should handle that next phase.
Plants, hardscape and the runoff you are responsible for
Walk the work area before water starts moving. Note plants, containers, painted surfaces, windows, pavement, drains, and neighboring property. Check the cleaner label for its required protection and runoff instructions.
Move portable objects out of the path. Test the cleaner on an inconspicuous hardscape area if the label allows it. Don’t assume a product suitable for stucco is also suitable for nearby stone, metal, paint, or concrete.
The exact runoff rule for every San Diego County address couldn’t be confirmed here. Ask the city or county that governs the property before allowing wash water to enter a street, gutter, or drain. That local authority sets the requirements for the address.
Plan where rinse water will travel before applying cleaner. Stop if it moves beyond the area you prepared or toward property you don’t control. Product directions still apply even when the cleaning area seems small.
A careful setup protects the test results too. Dirt splashed from pavement can land back on the wall and make a cleaned section look unsuccessful.
Stains that cleaning cannot fix, and what they mean
Cleaning can’t replace missing finish, close a crack, reattach loose material, or restore failed paint. It also can’t confirm why a stain keeps returning. Those conditions need inspection before another wash.
Stop when the remaining mark follows a crack, bulge, joint, patch, or opening. The same applies when the wall sheds grit, sounds different from nearby areas, or shows coating failure. Record what you observed without trying to name the hidden cause.
Recurring white deposits deserve a closer moisture review. Our efflorescence guide explains the identification questions to raise. Rust-colored staining also needs source identification before anyone chooses a repair or coating.
A clean wall can reveal repairs that were hidden by grime. It can also expose color or texture differences that washing won’t blend. At that point, a contractor may recommend repair, coating preparation, or another finish-specific response.
Don’t chase a permanent-looking stain with stronger pressure. When the test area stops improving, the useful cleaning phase has ended.
When to call us
Call when cleaning reveals cracks, loose finish, recurring stains, or possible moisture trouble. Confirm any contractor’s status through the CSLB license check before work begins. Call us at (858) 400-4352 and we’ll connect you with a licensed local stucco contractor.