A stucco inspection checks the wall surface, openings, drainage points, and moisture clues. It should identify areas needing closer testing without guessing what’s hidden. That distinction matters before a sale, repair, or insurance discussion.
Why people order a stucco inspection
Most inspections start with a decision or a warning sign. A buyer wants to understand the exterior before closing. A seller wants fewer surprises during escrow. A homeowner sees a crack, interior stain, or soft-looking wall section.
Insurance questions can also trigger an inspection. In that case, confirm what the carrier needs before scheduling. Some carriers may want photographs and a written assessment. Others may ask for documents from a contractor or another specialist. The carrier sets those requirements.
Location shapes the inspection’s focus. A wall in coastal Encinitas doesn’t have the same exposure as one in El Cajon. Homes in Chula Vista, City Heights, Escondido, and Oceanside also vary in age, construction, and past alterations. A useful inspector records those conditions instead of treating San Diego County as one uniform market.
An inspection isn’t automatically a repair proposal. Its first job is to document visible conditions and separate isolated cosmetic concerns from patterns needing more investigation. If the concern began with a wall crack, our guide to hairline and structural-looking stucco cracks explains the visual differences without diagnosing the building from a photograph.
Visual inspection versus probe or moisture-meter inspection
A visual inspection is non-invasive. The inspector studies accessible wall surfaces, edges, openings, transitions, and drainage locations. Photographs should connect each observation to a clear spot on the building.
This approach can reveal staining, cracking, bulging, gaps, damaged sealant, and past patches. It can’t show the complete condition behind an opaque wall. A clean surface also doesn’t prove that every concealed layer is dry or intact.
Moisture meters add another type of information. Readings can help identify areas that deserve comparison or closer examination. The report should name the meter type, test locations, surface conditions, and limits. A single reading shouldn’t be presented as a complete diagnosis without context.
Probe testing is more invasive. It may involve small openings at selected locations so concealed material can be examined. That work should be discussed in advance, including access, patching, and who will repair the openings. The person ordering the inspection should also understand why each location was selected.
Ask whether the proposed inspection is visual, meter-assisted, or invasive. Those scopes answer different questions, so the written agreement should match the decision you’re trying to make.
What an inspector looks at from the ground up
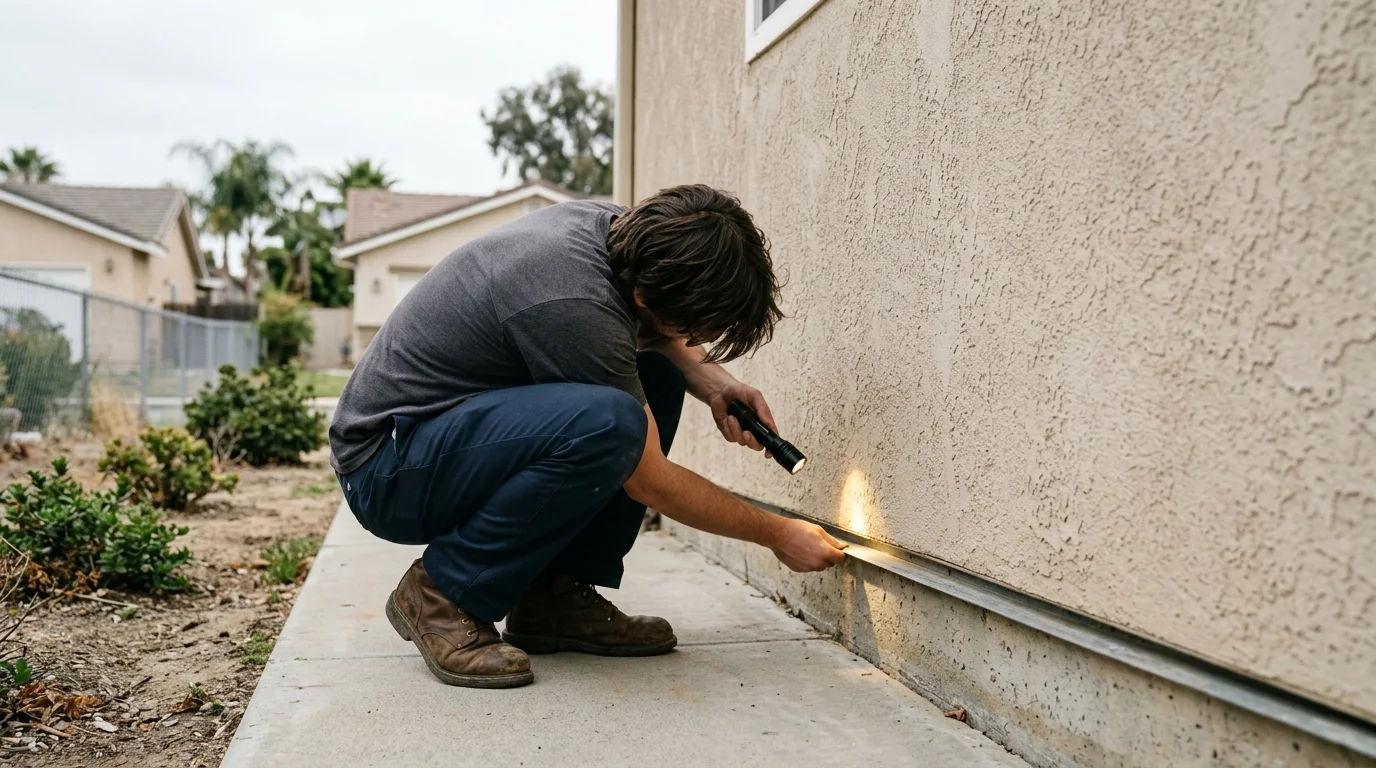
A careful walk starts where the stucco meets the foundation area. The inspector looks for blocked drainage paths, surface damage, soil or paving contact, staining, and changes made after the original wall work. The metal component often visible near the base is commonly called a weep screed. Its condition and surrounding clearance deserve documentation, but the report shouldn’t invent a required dimension.
From there, the inspection moves across each wall plane. The inspector maps cracks, patches, color changes, texture differences, and areas that appear out of plane. Previous repairs matter because they can show where a recurring condition has already received attention.
Corners, control joints, material transitions, utility penetrations, and attached features receive a closer look. Balconies, stairs, fences, planters, and patio covers can create complicated wall intersections. The inspection should record what’s visible without claiming to know the concealed assembly.
The upper wall and roofline complete the path. An inspector may document staining below roof edges, damaged surface areas, and questionable transitions around architectural details. Roof diagnosis remains outside a stucco-only scope unless the inspector is qualified and contracted for it.
For more context on lower-wall drainage, see our guide to weep screeds and stucco drainage in San Diego.
Penetrations: windows, doors, hose bibs, vents, light fixtures
Openings interrupt an otherwise continuous wall. That makes windows, doors, vents, hose bibs, light fixtures, electrical boxes, and pipe penetrations important inspection points.
The inspector looks at the joint between each item and the surrounding stucco. The report may note gaps, cracked sealant, staining, loose fixtures, patchwork, or missing visible transitions. It should distinguish an observation from a conclusion about hidden damage.
Windows and doors need attention at their corners, sills, heads, and adjacent wall areas. A stain below a corner may help direct further testing, but it doesn’t identify the cause by itself. Water may travel before becoming visible.
Fixtures also need a practical check. An inspector should note whether attachments appear to have disturbed the finish or created an unsealed-looking opening. That doesn’t mean the fixture caused concealed damage. It means the location deserves documentation.
Interior clues should be compared with exterior features. A stain beside a window becomes more useful when the report identifies what lies outside that same area.
Reading cracks: pattern, width, location, direction
A crack tells a story through its pattern, not merely its presence. The inspector records where it starts, where it ends, and which building features it crosses. Direction and repetition can matter more than an isolated measurement.
Hairline surface cracks may appear different from wider openings or cracks that return after patching. Stair-step patterns, diagonal cracks near corners, and continuous lines across wall features should be mapped carefully. The report should avoid declaring a structural cause from appearance alone.
Location provides context. A crack beside a window corner carries different information from random fine checking across a broad wall. A line following a previous patch may point to movement at the same location, a repair-material issue, or another condition needing investigation. The inspection alone may not settle which explanation is correct.
Photographs work best when they include both detail and context. A close image shows the opening. A wider image shows its relationship to windows, doors, corners, and rooflines. The report should also identify any area blocked by landscaping, storage, fences, or limited access.
If movement or structural distress is suspected, the inspector should recommend the appropriate specialist. A stucco report shouldn’t stretch beyond the inspector’s qualifications.
Signs of trapped moisture behind the wall
Concealed moisture can’t be confirmed by surface appearance alone. The inspector instead looks for a group of clues that may justify meter readings, probing, or another targeted evaluation.
Those clues can include persistent staining, softened areas, bubbling coatings, bulging surfaces, repeated patch failure, or deterioration near openings. Interior discoloration, musty odors, or damaged trim may also help define the area of concern. None proves a specific source on its own.
The inspection should trace possible paths. That means looking above, beside, and inside the affected area rather than focusing only on the most visible mark. A stain below a window may relate to that opening, an attachment, the roofline, plumbing, or another route. Testing narrows the possibilities.
San Diego’s coastal neighborhoods deserve the same disciplined process as inland communities. Our article on coastal stucco moisture damage explains why symptoms and entry points must be evaluated separately.
When findings point toward the wall’s water-management layers, a licensed contractor can assess waterproofing and moisture-barrier work. The repair scope should follow the evidence, not a guess based on one stain.
Efflorescence, staining and bulging as symptoms, not causes
Efflorescence, discoloration, and bulging describe what someone can see. They don’t identify the full cause.
A white deposit may be documented as efflorescence when that description fits the visible condition. Staining should be recorded by color, location, and relationship to nearby openings or drainage points. Bulging should be photographed from angles that show the wall plane.
The next step is finding the pattern. Is the symptom near the foundation, below a window, under a roof edge, or around a fixture? Does it appear on one wall or several? Is there a matching interior concern?
Cleaning or painting over a symptom may hide useful evidence. Before cosmetic work begins, the report should explain whether more investigation is recommended. Our guide to stucco efflorescence offers more context on documenting white deposits without treating appearance as a complete diagnosis.
What a report should tell you and what it can’t tell you
A useful report identifies the property areas inspected, the methods used, and any access limits. It pairs photographs with locations and plain descriptions. It also separates observations, interpretations, and recommended next steps.
The report should prioritize findings. Some areas may need monitoring. Others may need targeted testing or review by a licensed stucco contractor. Suspected structural, roofing, plumbing, or electrical concerns should be directed to someone qualified for that field.
Ask for clarity when a report uses broad terms such as “failed stucco” or “water intrusion.” The document should explain what was observed and how the conclusion was reached. If testing wasn’t performed, that limitation should appear plainly.
An inspection can’t reveal every concealed condition. It can’t guarantee future performance or replace a repair contract. It also shouldn’t promise that a wall meets every current code requirement based only on visible surfaces.
If the findings lead to regulated stucco work, verify the contractor through the CSLB license check. Stucco work falls under the CSLB C-35 lathing and plastering classification.
Why an inspection can’t tell you your fire-zone status or a code specific
A stucco inspection doesn’t determine whether a parcel sits within a mapped fire-hazard area. California addresses exterior wall assemblies in wildland-urban interface areas through California Building Code Chapter 7A. Whether those provisions apply to a property depends on mapped status and the project.
Check the property through Cal Fire’s current mapping. Then confirm the result with the local building department serving that address. The city or county that issues permits where you live decides how current requirements apply to a proposed project.
The same limit applies to code details. An inspector can document visible components and apparent damage. That isn’t the same as confirming every concealed layer or approving a wall assembly.
A report should avoid assigning fire-zone status, quoting an unconfirmed material requirement, or declaring code compliance beyond its scope. If a repair or replacement is planned, the matched contractor and local building department can address the project-specific questions.
What to do with the findings
Start by sorting findings into monitoring, further testing, and repair. Keep the photographs and location notes together. They create a useful baseline for comparing future changes or discussing work with a contractor.
For moisture clues, ask what evidence supports opening the wall. For cracks, ask whether the recommendation addresses only the finish or a deeper condition. For widespread damage, confirm which wall areas are included and which remain untested.
Get the repair scope in writing. It should identify the affected locations, planned materials, finish expectations, access needs, and responsibility for related work. Don’t assume every contractor includes paint, trim, window work, or interior repairs.
California’s home-improvement downpayment cap is $1,000 or 10 percent of the contract amount, whichever is less. The contractor exemption applies only when the total contract price is under $1,000, the work is casual and minor, and no permit is required. That threshold has applied since January 1, 2026. Splitting work into smaller contracts doesn’t create the exemption.
Use the report as a decision tool, not a verdict. Good findings narrow the problem, define the next question, and help a licensed professional quote the right work.
When to call us
Call when the inspection identifies cracking, suspected moisture, failed patches, or wall areas needing a licensed stucco pro. Call us at (858) 400-4352 and we’ll connect you with a licensed local stucco contractor.